HOW TO CHECK IF USER IS ONLINE OR OFFLINE IN FLUTTER

In this tutorial, we’ll learn how to implement Online & Offline connectivity in flutter apps. Their time comes when we need to check the Internet connection. If the user doesn’t have an internet connection, then we’ll show them Drop Offline connection, which will be an Animated Container widget. It will also work both Wifi connectivity and mobile data.
Flutter is an Open Source project by Google Which allows us to Create App For Both Android & IOS Platform. So For this connectivity, we will use a Flutter package name flutter_offline. This plugin perfectly works for both Platform iOS and Android app. By using this Package You can Also check Connection for Android & IOS Platform, which is the Tinny Package.

💻 Installation

First, you will need to add package name flutter_offline:
In the dependencies: section of your pubspec.yaml, add the following lines as :
Now run Flutter package get in your terminal which we’ll install flutter_offline package.

⚡️ Import

we’re Going to Wrap offlineBuilder with Builder widget because with the help of Builder Widget so we can show OfflineBuilder
With the help of the Bool Variable, we can access Connectivity state, with the help of Connectivity State, we can implement online & offline connectivity in the flutter app.

  1. //main.dart
  2. import 'package:flutter/material.dart';
  3. import 'package:flutter_offline/flutter_offline.dart';
  4. void main() => runApp(new MyApp());
  5. class MyApp extends StatelessWidget {
  6. @override
  7. Widget build(BuildContext context) {
  8. return MaterialApp(
  9. debugShowCheckedModeBanner: false,
  10. home: Scaffold(
  11. appBar: AppBar(
  12. title: Text("Connection"),
  13. ),
  14. body: Builder(
  15. builder: (BuildContext context) {
  16. return OfflineBuilder(
  17. connectivityBuilder: (BuildContext context,
  18. ConnectivityResult connectivity, Widget child) {
  19. final bool connected =
  20. connectivity != ConnectivityResult.none;
  21. return Stack(
  22. fit: StackFit.expand,
  23. children: [
  24. child,
  25. Positioned(
  26. left: 0.0,
  27. right: 0.0,
  28. height: 32.0,
  29. child: AnimatedContainer(
  30. duration: const Duration(milliseconds: 300),
  31. color:
  32. connected ? Color(0xFF00EE44) : Color(0xFFEE4400),
  33. child: connected
  34. ? Row(
  35. mainAxisAlignment: MainAxisAlignment.center,
  36. children: <Widget>[
  37. Text(
  38. "OFFLINE",
  39. style: TextStyle(color: Colors.white),
  40. ),
  41. ],
  42. )
  43. : Row(
  44. mainAxisAlignment: MainAxisAlignment.center,
  45. children: <Widget>[
  46. Text(
  47. "OFFLINE",
  48. style: TextStyle(color: Colors.white),
  49. ),
  50. SizedBox(
  51. width: 8.0,
  52. ),
  53. SizedBox(
  54. width: 12.0,
  55. height: 12.0,
  56. child: CircularProgressIndicator(
  57. strokeWidth: 2.0,
  58. valueColor:
  59. AlwaysStoppedAnimation<Color>(
  60. Colors.white),
  61. ),
  62. ),
  63. ],
  64. ),
  65. ),
  66. ),
  67. ],
  68. );
  69. },
  70. child: Center(
  71. child: Text("ONLINE Or OFFLINE"),
  72. ),
  73. );
  74. },
  75. )),
  76. );
  77. }
  78. }


Add Google Admob Ads To Your Flutter APP 2020

ADD GOOGLE ADMOB ADS TO YOUR FLUTTER APP (BEST AND EASY WAY)

ADD-ADMOB-ADS-TO-YOUR-FLUTTER-APPS

n this tutorial, I will show you how to Implement Admob ads in a Flutter app by using Firebase_admob packages to easily implement ads into a Flutter app. As we can say Flutter is Fast & Really Easy Way to Make Android apps. In This Tutorial, I am  Going to show Demo Ads by Admob like Banner Ads & Interstitial Ads.
Google Admob is an Easy Way to Monetize your Android and iOS apps, which will generate revenue from your app. Google Admob can be Displayed Banner Ads, Interstitial Ads & Video Ads. Google Admob is the Prime Monetization Platform for iOS and Android apps.
If you Don’t know how to Create a Flutter app, check out Getting started with Flutter official tutorial.
We’re going to begin by adding a firebase_admob package to our dependencies in our pubspec.yaml file:

ADD-ADMOB-ADS-TO-YOUR-FLUTTER-APPS

And press Ctrl + S  Get flutter package get with exit code 0

Its Demo Ads. Not For Real One

This guide will explain to you understand, how to Implement Admob Ads in a flutter. It’s Important to enable Demo Ads during Development So that you can click on them without Violate ‘Admob Policy‘. Disclaimer Don’t click on your Own Real Admob Ads either it will violate Admob Policy by Google 

 For Android User, AndroidManifest changes:

You Need to Add the Following Line in the androidmanifest.xml to Avoid  crash on the launch of your Android app
<meta-data                                                    
    android:name="com.google.android.gms.ads.APPLICATION_ID"   
    android:value="[ADMOB_APP_ID]"/>                          

For iOS User, Info.plist changes:

You Need to Add the Following line Info.plist  to Avoid Crash on the launch of your iOS App
<key>GADApplicationIdentifier</key>                           
<string>[ADMOB_APP_ID]</string>                               

ADD-ADMOB-ADS-TO-YOUR-FLUTTER-APPS

Add import 'package:firebase_admob/firebase_admob.dart';
into main.dart just below material.dart line.
Create one const String variable & give an Empty Space Or Write 'Mobile_id'
const String testDevice = 'Mobile_id';
Okay After that Create  MobileAdTargetingInfo for implementing Keyword, test devices & nonPersonalizedAds.
After that, We Created Two Variables First BannerAd & Second Variable For Interstitial Ads
static const MobileAdTargetingInfo targetingInfo = MobileAdTargetingInfo(
testDevices: testDevice != null ? <String>[testDevice] : null,
nonPersonalizedAds: true,
keywords: <String>['Game', 'Mario'],
);
BannerAd _bannerAd;
InterstitialAd _interstitialAd;
//Banner Ads
BannerAd createBannerAd() {
return BannerAd(
adUnitId: BannerAd.testAdUnitId,
//Change BannerAd adUnitId with Admob ID
size: AdSize.banner,
targetingInfo: targetingInfo,
listener: (MobileAdEvent event) {
print("BannerAd $event");
});
}
//Interstitial Ads
InterstitialAd createInterstitialAd() {
return InterstitialAd(
adUnitId: InterstitialAd.testAdUnitId,
//Change Interstitial AdUnitId with Admob ID
targetingInfo: targetingInfo,
listener: (MobileAdEvent event) {
print("IntersttialAd $event");
});
}
view rawmain.dart hosted with ❤ by GitHub

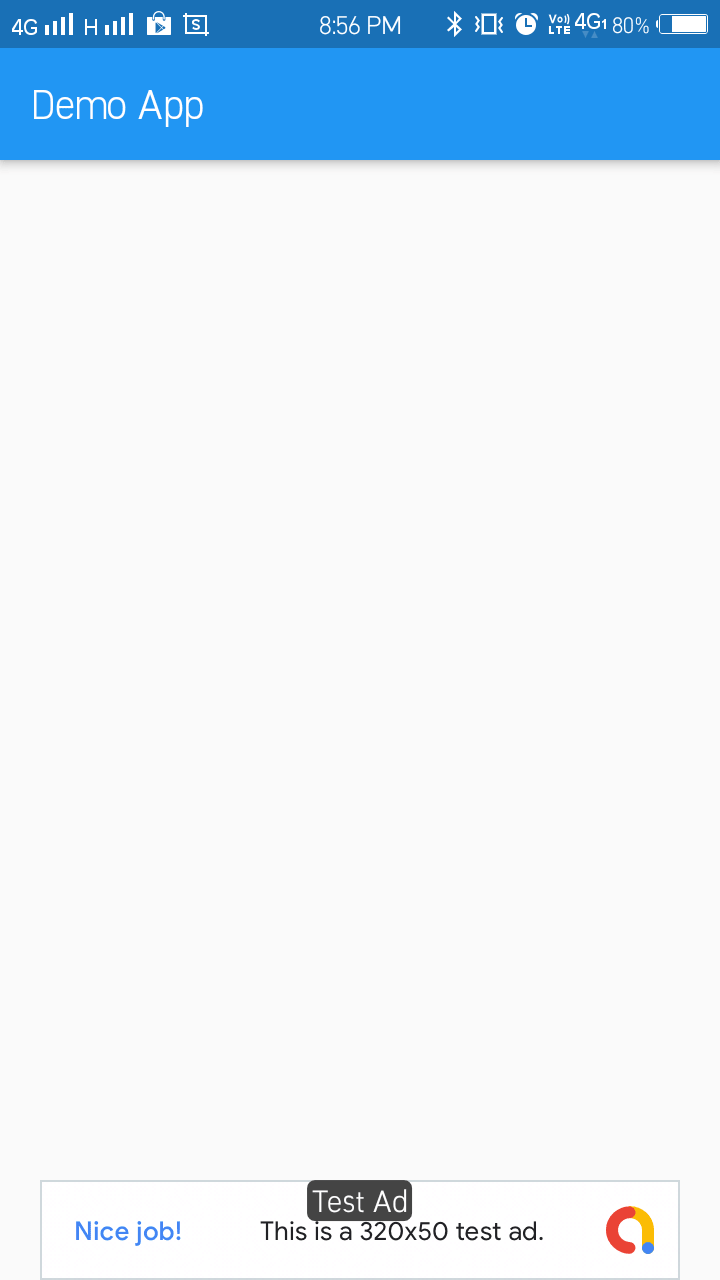
After that, We are going to create initState for initializing Our Banners Ads whenever User Open Flutter apps it will automatically Initialize Banner ads in the Bottom Bar
@override
void initState() {
FirebaseAdMob.instance.initialize(appId: BannerAd.testAdUnitId);
//Change appId With Admob Id
_bannerAd = createBannerAd()
..load()
..show();
super.initState();
}
@override
void dispose() {
_bannerAd.dispose();
_interstitialAd.dispose();
super.dispose();
}
view rawmain.dart hosted with ❤ by GitHub

After Creating InitState We need to implement RaisedButton where we are going to initialized Interstitial Ads
In the RaisedButton, On Onpressed button add Properties like to Load Interstitial Ads


ADD-ADMOB-ADS-TO-YOUR-FLUTTER-APPSADD-ADMOB-ADS-TO-YOUR-FLUTTER-APPS
Admob Ads


Full Code:

import 'package:flutter/material.dart';
import 'package:firebase_admob/firebase_admob.dart';
const String testDevice = 'MobileId';
void main() => runApp(MyApp());
class MyApp extends StatefulWidget {
@override
_MyAppState createState() => _MyAppState();
}
class _MyAppState extends State<MyApp> {
static const MobileAdTargetingInfo targetingInfo = MobileAdTargetingInfo(
testDevices: testDevice != null ? <String>[testDevice] : null,
nonPersonalizedAds: true,
keywords: <String>['Game', 'Mario'],
);
BannerAd _bannerAd;
InterstitialAd _interstitialAd;
BannerAd createBannerAd() {
return BannerAd(
adUnitId: BannerAd.testAdUnitId,
//Change BannerAd adUnitId with Admob ID
size: AdSize.banner,
targetingInfo: targetingInfo,
listener: (MobileAdEvent event) {
print("BannerAd $event");
});
}
InterstitialAd createInterstitialAd() {
return InterstitialAd(
adUnitId: InterstitialAd.testAdUnitId,
//Change Interstitial AdUnitId with Admob ID
targetingInfo: targetingInfo,
listener: (MobileAdEvent event) {
print("IntersttialAd $event");
});
}
@override
void initState() {
FirebaseAdMob.instance.initialize(appId: BannerAd.testAdUnitId);
//Change appId With Admob Id
_bannerAd = createBannerAd()
..load()
..show();
super.initState();
}
@override
void dispose() {
_bannerAd.dispose();
_interstitialAd.dispose();
super.dispose();
}
@override
Widget build(BuildContext context) {
return MaterialApp(
debugShowCheckedModeBanner: false,
title: 'Flutter Demo',
theme: ThemeData(),
home: Scaffold(
appBar: AppBar(
title: Text("Demo App"),
),
body: Center(
child: RaisedButton(
child: Text('Click on Ads'),
onPressed: () {
createInterstitialAd()
..load()
..show();
},
)),
),
);
}
}
view rawmain.dart hosted with ❤ by GitHub

You can see the full source code of the project here.

Enjoyed the Tutorial? Please leave a LIKE 👍 to show your support and appreciation
💬 If you have a question about anything, I’ll do my best to answer it.