
HOW TO CREATE FACEBOOK MESSENGER BOT.
Pilar is a product design at Crowdbotics gaining practical experience in chatbots, test computerization, and frontend improvement.
Thus, you're here in light of the fact that you need to make your first chatbot. Or on the other hand perhaps you've officially assembled one, and you need to know how you can enhance your chatbot's reactions with NLP.
Today, I will demonstrate to you precisely generally accepted methods to do that! We'll fabricate a chatbot with rich NLP highlights utilizing Dialogflow, Wit.ai, and Node.js. The best part? It'll take us only one day.
We should survey. What is a chatbot?
Chatbots are PC programs that emulate discussion with individuals using man-made brainpower.
More or less, when somebody types in a message, the bot reacts with the correct answer.
Out of the a large number of chatbots that exist today, most are envoy applications intended to speak with clients. They work with Natural Processing Language (NLP) frameworks which make an interpretation of ordinary dialect into a shape that the bot can comprehend and take in new communications from.
Pilar is a software engineer at Crowdbotics specializing in chatbots, test automation, and frontend development.
So, you’re here because you want to create your first chatbot. Or maybe you’ve already built one, and you want to know how you can improve your chatbot’s responses with NLP.
Today, I’m going to show you exactly how to do that! We’ll build a chatbot with rich NLP features using Dialogflow, Wit.ai, and Node.js. The best part? It’ll take us just one day.
Let’s review. What is a chatbot?
Chatbots are computer programs that mimic conversation with people through the use of artificial intelligence.
In a nutshell, when someone types in a message, the bot responds with the right reply.
Out of the thousands of chatbots that exist today, most are messenger apps designed to communicate with customers. They work with Natural Processing Language (NLP) systems which translate everyday language into a form that the bot can understand and learn new interactions from.
Through the help of that technology, bots now hold endless possibilities. You can use them to read everyday news, get the weather, transfer money, buy your favorite items, schedule a meeting, or even get service assistance. And all from the convenience of your favorite messenger app.
People are now spending more mobile screen time on messaging than on social media. A lot of companies have noticed the trend and are taking advantage of chatbots as a new channel to talk to us. Turns out that a whopping 60% of online adults in the US use online messaging, voice or video chat services.
Even stranger? It’s thought that by 2020, we’ll have more conversations with bots than with our actual spouses.
Choose your tech: Dialogflow or wit.ai?
We’re choosing between two popular platforms when building our chatbot: Dialogflow and wit.ai.
Dialogflow
Dialogflow (once known as Api.ai) is a service owned by Google that allows developers to build speech to text, natural language processing and artificially intelligent systems that you can train with your own custom functionality. This incredible tool uses machine learning to understand what users are saying and it’s beyond simple to set up nonlinear bots quickly.
Advantages
- It’s Useful: It integrates NLP without much hassle.
- It’s Easy: Dialogflow contains lots of pre-built agents that are a breeze to activate.
- It’s Integrated: You can connect your favorite platforms such as Facebook, Twitter, Slack, Telegram, etc…
- It’s Multilingual: It recognizes more than 15 languages.
- It’s Cheap: You’ll be glad to know it’s totally free.
Disadvantages
- It’s Not So Customizable: If you want to create a customizable bot, you will need to implement a code flow, and these examples are not shown in any of its documentation.
- It’s Not So Implementable: It can be tricky to figure out how to perform platforms implementations as it is not documented.
Wit.ai
Wit.ai (owned by Facebook) works similarly to Dialogflow: it also processes human speech patterns and filters useful data like intent and context from it. Like Dialogflow, it provides a UI to help developers with creating intents, entities and agents.
What Are Its Pros?
- It’s Also Useful: Wit.ai also integrates NLP.
- It’s Also Easy: The Quickstart tutorial is very practical in order to get started.
- It’s Also Integrated: You’ll also be able to integrate with several platforms, like Facebook, Twitter, Slack, Telegram, etc…
- It’s Also Cheap: Totally free!
- It’s Adaptable: You’ll be able to build your bot with Node.js, Python or Ruby.
- It’s Pragmatic: Enjoy an easy to read “Recipes” section for common problems and how you can solve them.
What Are Its Cons?
- It’s Not-So Fast: Since the learning curve is steep, you’ll need to invest time into figuring out how to implement it.
- It’s Not-So Visual: Given that there’s no visual development environment, you’ll need to be comfortable with code.
So which did we pick?
Given that Dialogflow provides junior developers with the best documentation and a great user experience for developing a bot without being an expert in the field, we’ve decided to give it a shot for this tutorial.
A step-by-step guide to building the chatbot
In this tutorial, we’ll be using Node.js to build a simple bot, so please make sure it’s installed on your computer.
So let’s get started!
Step 1: Setting up your development environment
Let’s create a simple webserver with one webhook endpoint. I’ll use Express.js.
1. Writing webhook server with Express
First of all, we need to know that a webhook (also called a web callback or HTTP push API) is a way for an app to provide other applications with real-time information. It delivers data to other applications as it happens, meaning you get data immediately, unlike typical APIs where you would need to poll for data very frequently in order to get it in real-time.
In order to get started, you will have to create a new directory, where you’ll store your entire project. We are going to name it “Bot Tutorial”.
Once, you have created it, go to your terminal, access this directory and initialize your Node.js app with:
npm init
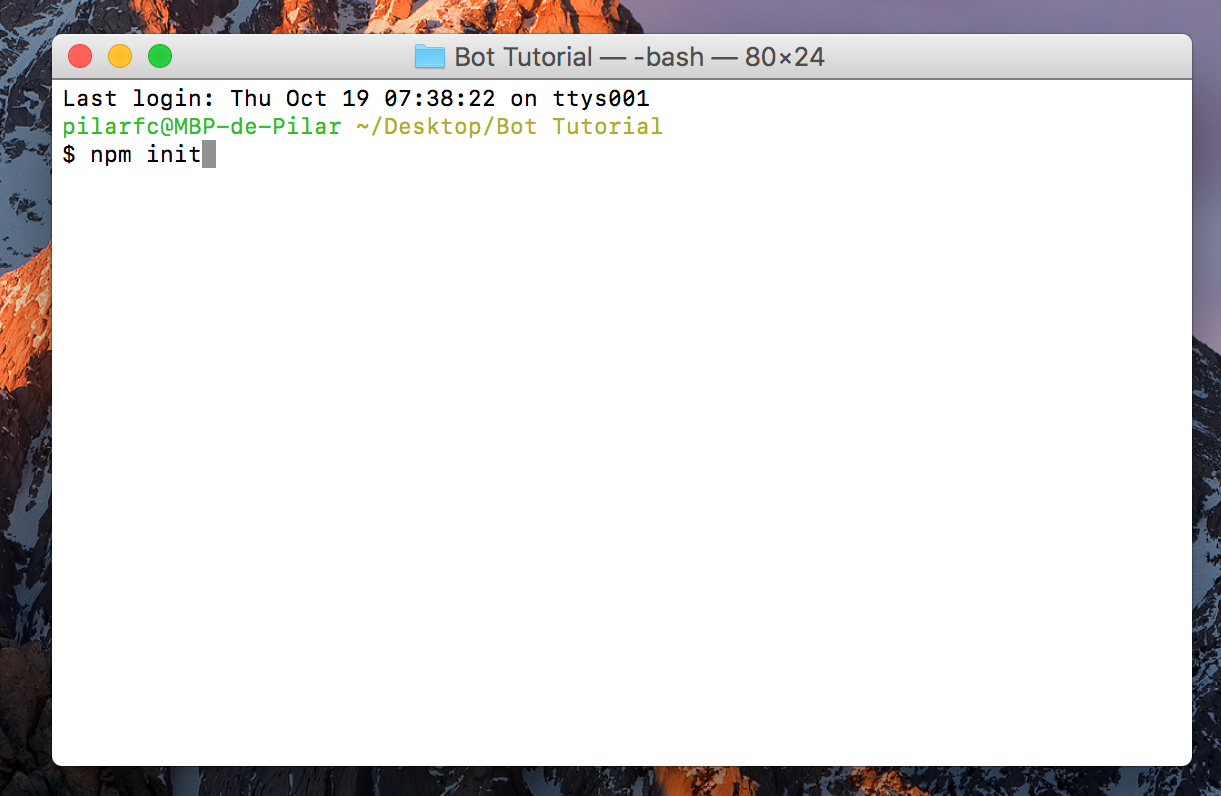
Press Enter.
After filling out all the needed info (if you don’t know how to fill package.json, take a look here), your next step will be to install Express to setup a server and one middleware for it, called body-parser to parse incoming request bodies. So, in your terminal type:
npm install express body-parser --save
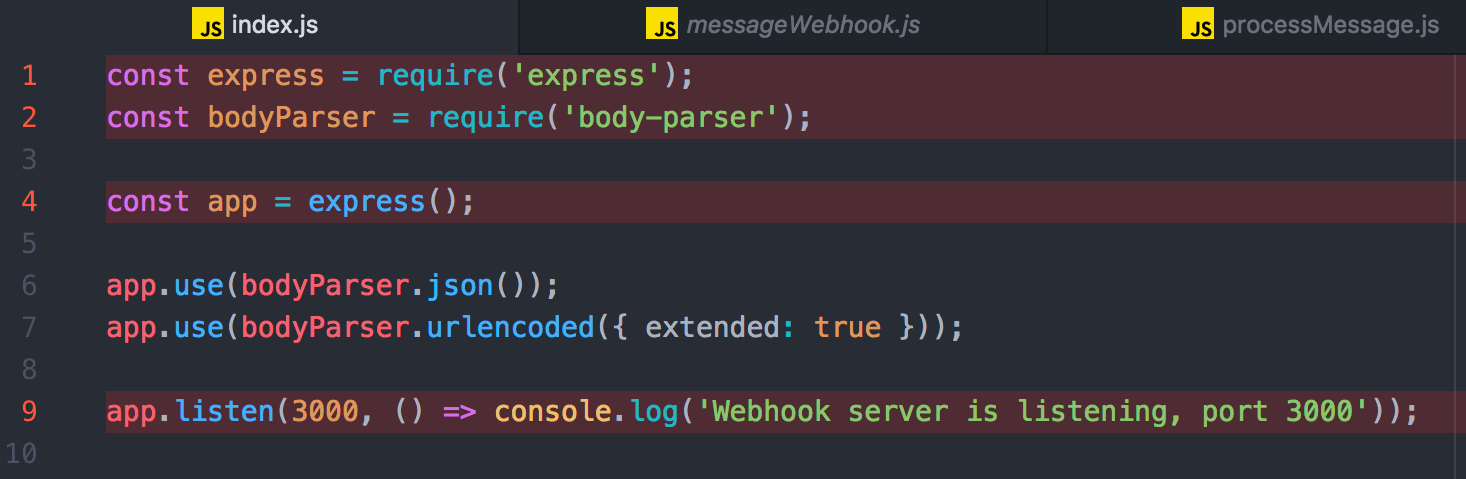
Once the installation is complete, go to your directory and create a file called index.js and start Express server listening to the port 3000 (you can take any you want).
const express = require(‘express’);
const bodyParser = require(‘body-parser’);
const app = express();
app.use(bodyParser.json());
app.use(bodyParser.urlencoded({ extended: true }));
app.listen(3000, () => console.log(‘Webhook server is listening, port 3000’));
Save it and let’s check if it’s working. Run this command in your terminal:
node index.js
And if everything is working how it should be, you will receive the following message in your terminal:
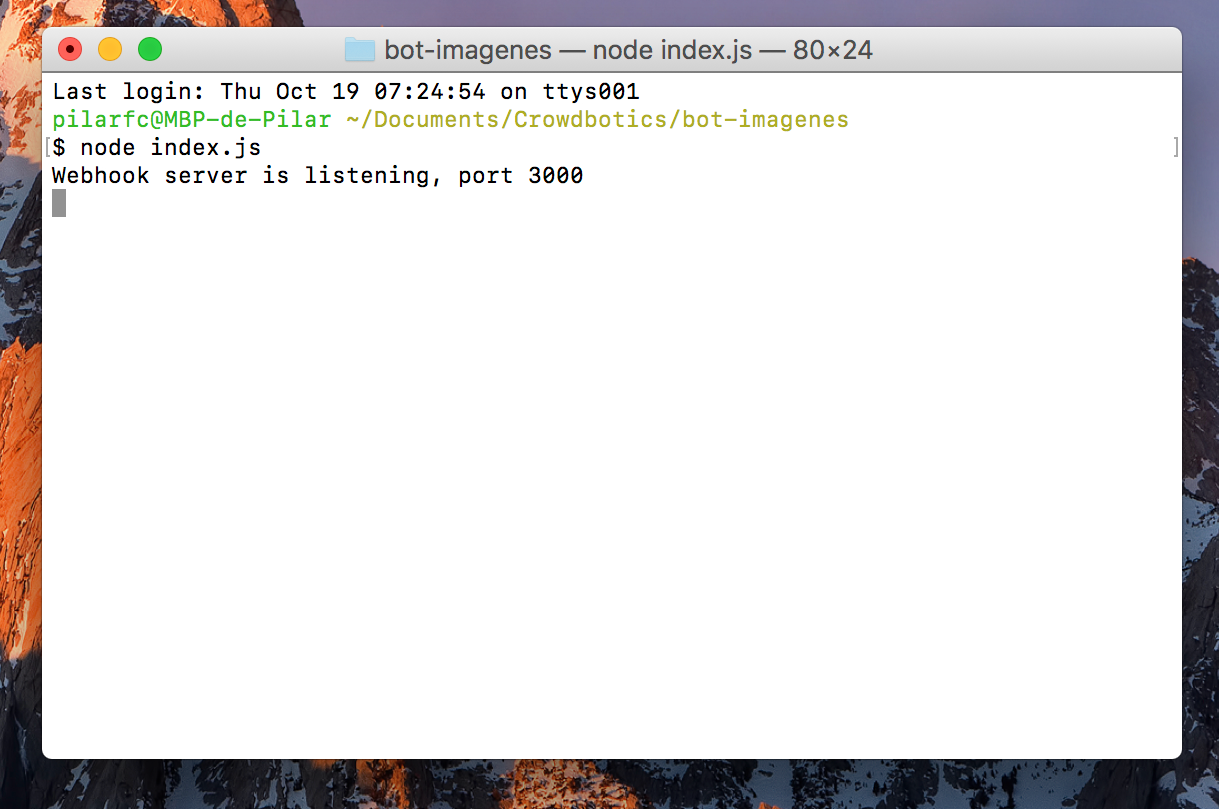
Great, our server is listening! Now we are going to create two endpoints:
- One will be for Facebook initial verification. The reason why we need to do this is because when you’re connecting a Facebook page with the webhook server you will also need have a token. Facebook will make a request and match this token to that one webhook response to be sure that you’re not connecting your page with a random webhook server.
- The second one will be responsible for the other messages from Facebook Messenger.
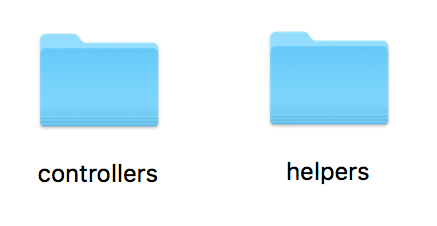
But before we go any further, we will organize our code in two separate folders: controllers and helpers. For each separate endpoint we’ll create a function in a separate file in the controllers folder.
The first verification endpoint goes to controllers/verification.js.
module.exports = (req, res) => {
 const hubChallenge = req.query[‘hub.challenge’];
const hubMode = req.query[‘hub.mode’];
 const verifyTokenMatches = (req.query[‘hub.verify_token’] === ‘crowdbotics’);
if (hubMode && verifyTokenMatches) {
 res.status(200).send(hubChallenge);
 } else {
 res.status(403).end();
 }
};
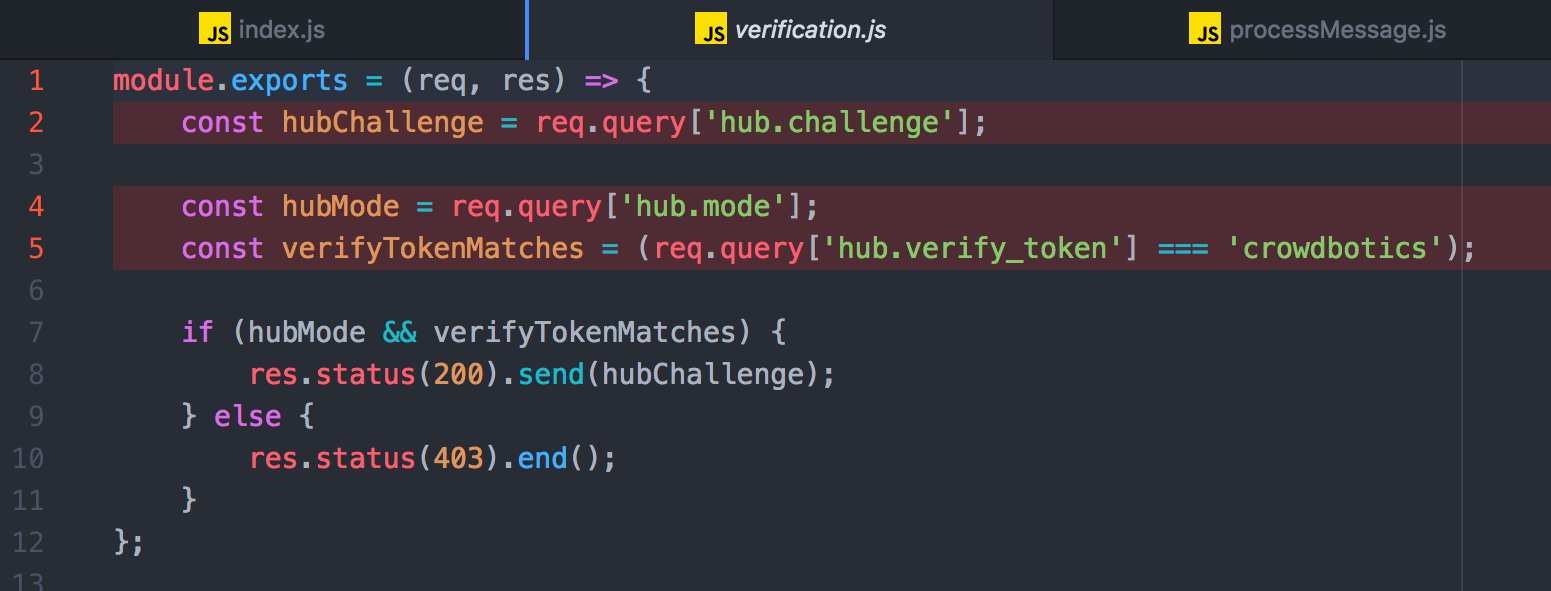
Here you can see a string called “crowdbotics” . You can change it and choose any word or text string that you prefer. Make sure to make a note of it as you will need it later when setting up your Facebook app.
The second endpoint for handling all the Facebook bot messages will go to controllers/messageWebhook.js.
const processMessage = require(‘../helpers/processMessage’);
module.exports = (req, res) => {
 if (req.body.object === ‘page’) {
 req.body.entry.forEach(entry => {
 entry.messaging.forEach(event => {
 if (event.message && event.message.text) {
 processMessage(event);
 }
 });
 });
res.status(200).end();
 }
};

Now, if you left your console running with the port 3000, stop it and rewrite this command in there:
node index.js
2. Setting up a proxy server with ngrok
Why do we need this step? Well, our local Express server url is not available for everyone on the Internet and also, it doesn’t support HTTPS protocol, which is necessary for Facebook Messenger bots. We will therefore set up a grok server as a proxy.
Ngrok is a multiplatform tunnelling, reverse proxy software that establishes secure tunnels from a public endpoint such as the Internet to a locally running network service while capturing all traffic for detailed inspection and replay.
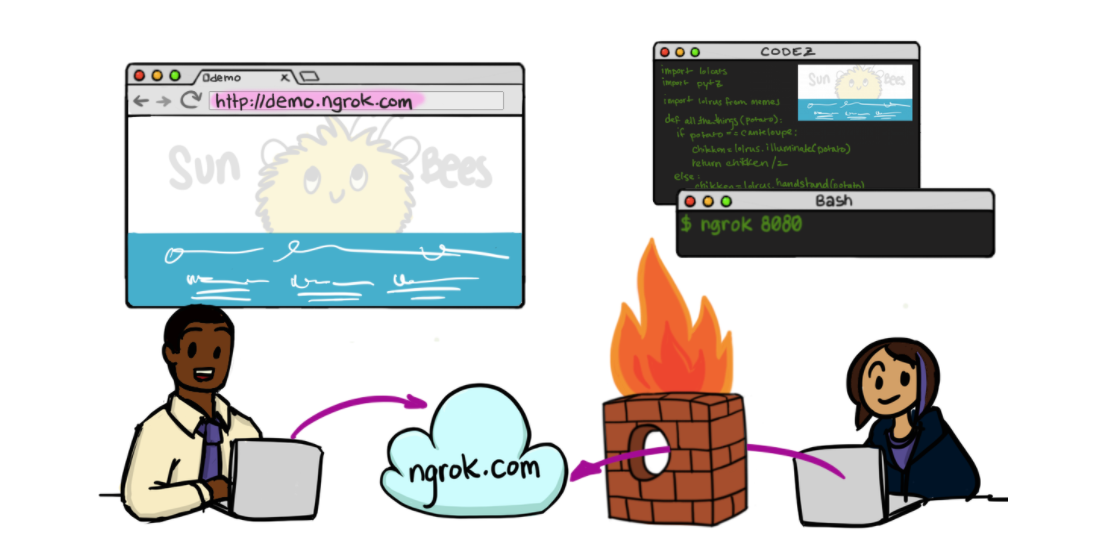
Image from https://ngrok.com/
But if this is not clear, you can read more about it here.
Once you finish reading and installing ngrok, open another terminal window and position it in the directory of your project (meanwhile your local server is running) and type the following command:
ngrok http 3000
“3000” is going to be the number you chose for your local server.
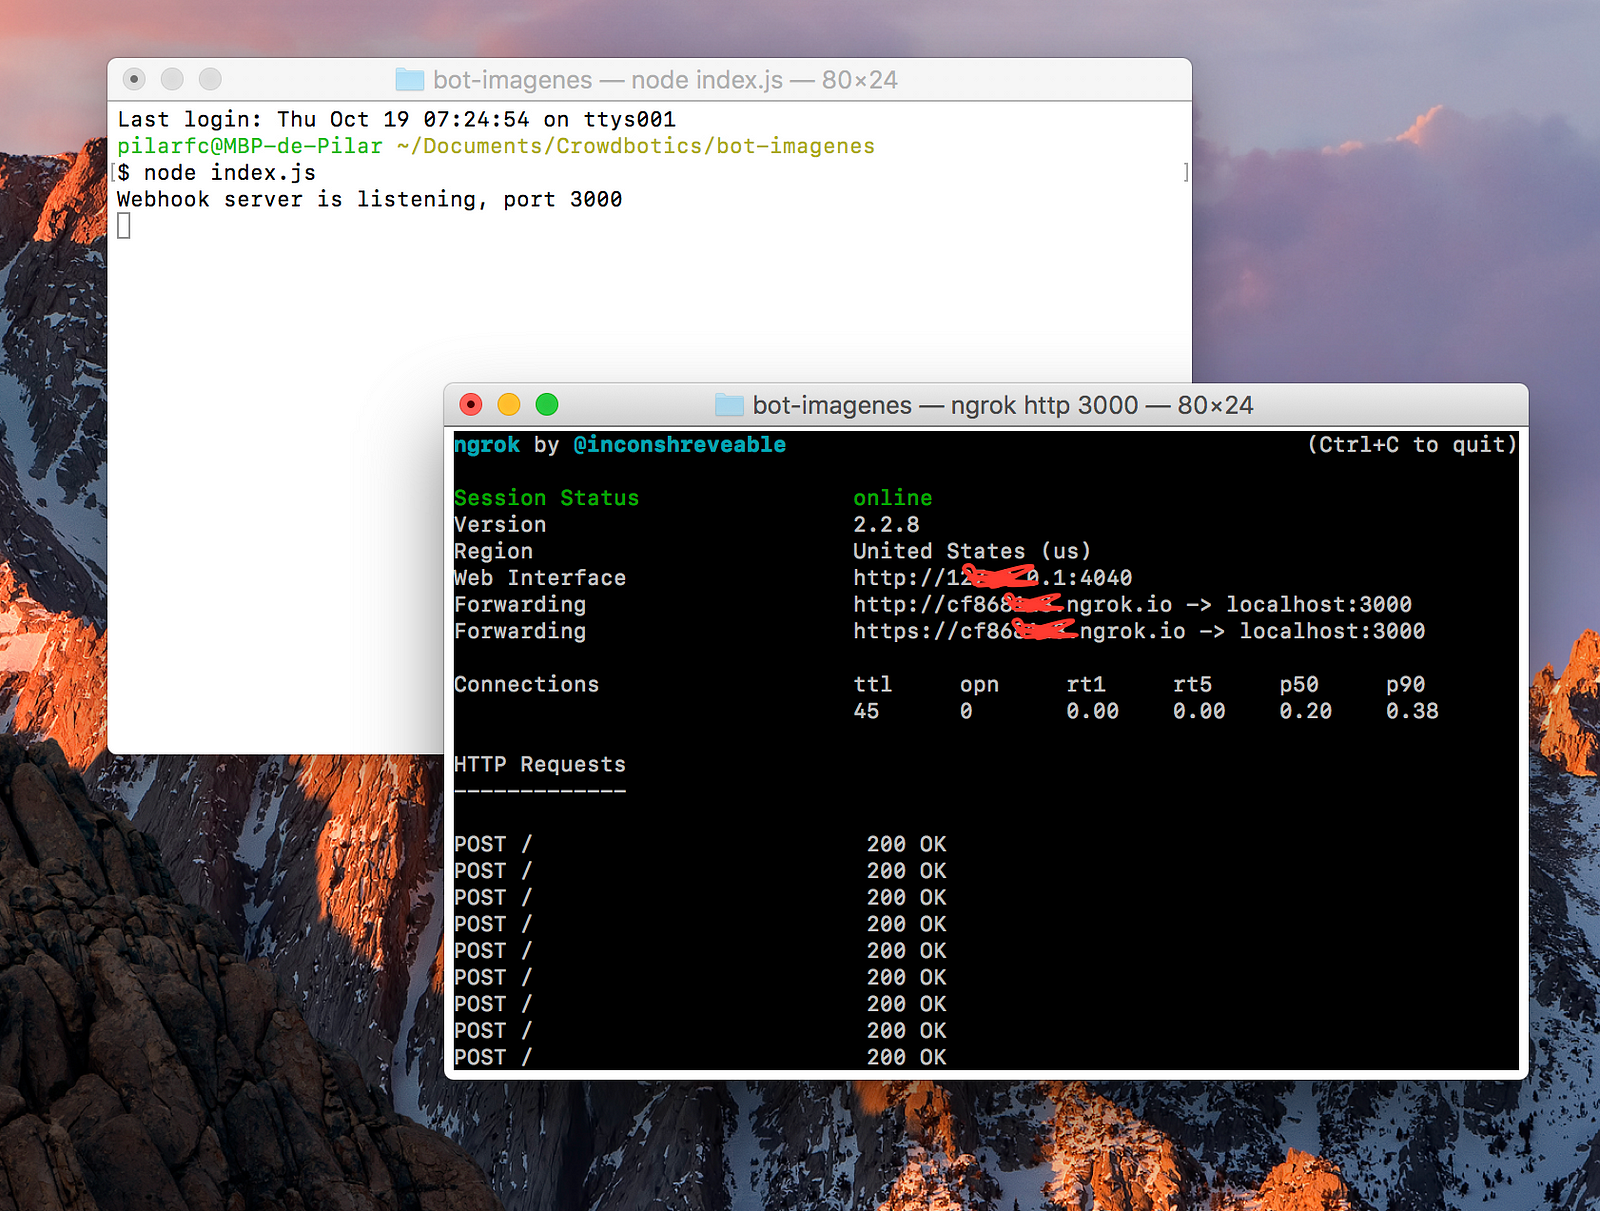
It’ll show you a new screen with a couple of URLs, the URL that you’ll need is the last one that starts with https://cf86…
3. Setting up Facebook Application
Before continuing to send requests to Facebook, let’s create our Facebook app.
To create a Facebook bot, we need to two things:
- A Facebook public page, that you’ll connect with your bot.
- A Facebook Developer application, which will be connected to your webhook server and your public page, and work as a middleware between them.
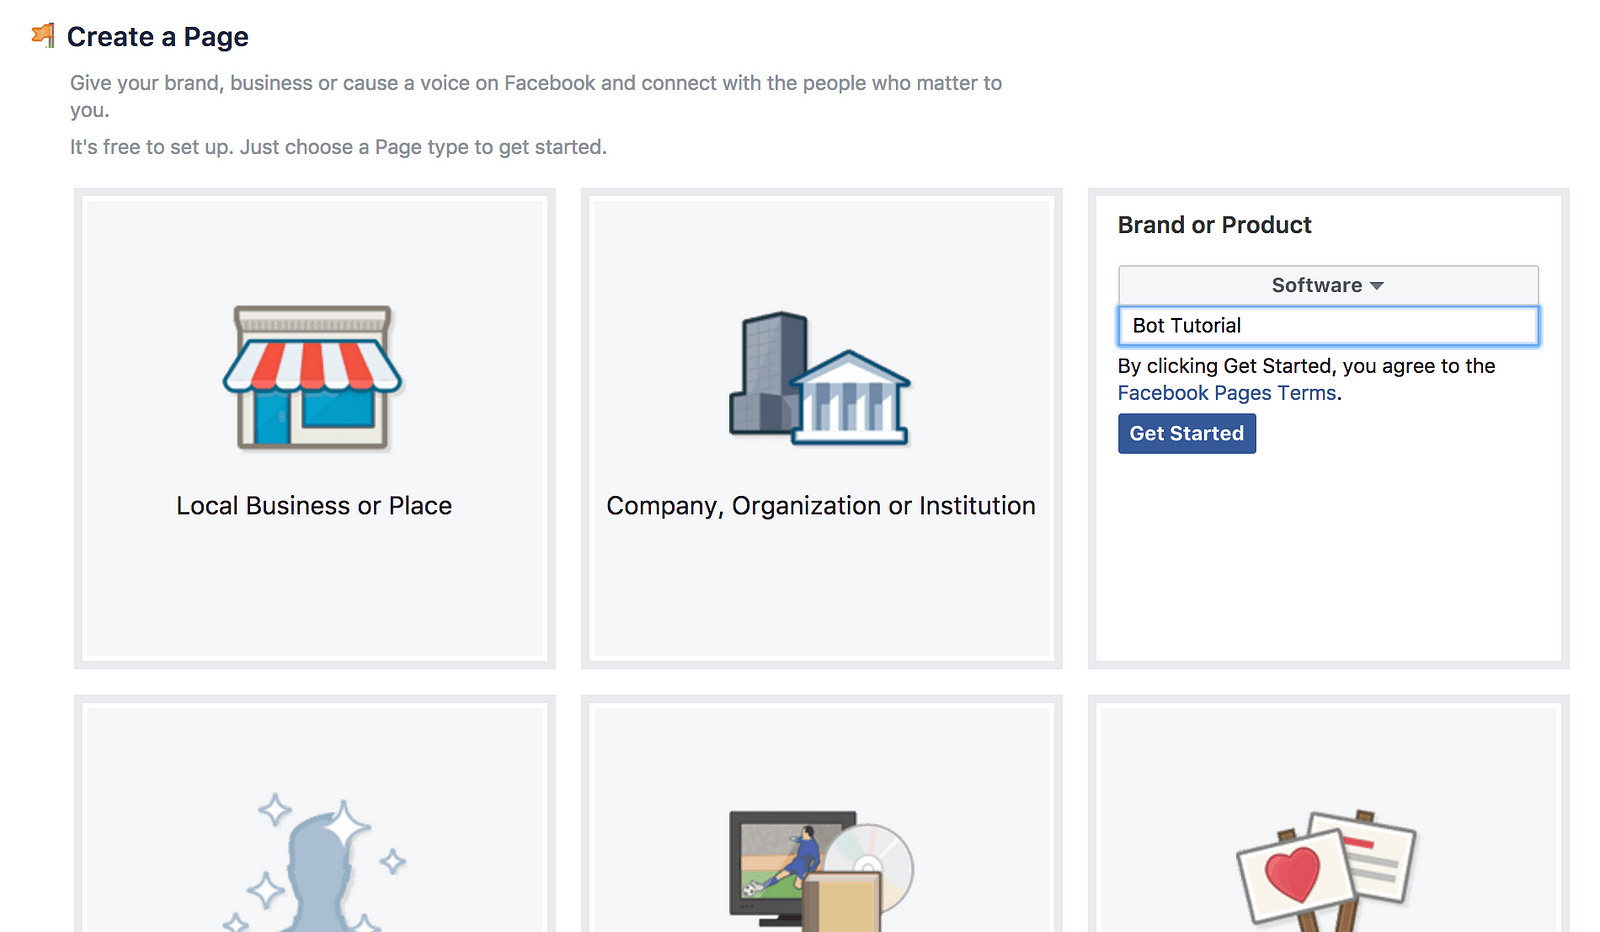
First you need to create a page. Go to facebook.com/pages/create. Choose a category, subcategory and click Get Started.
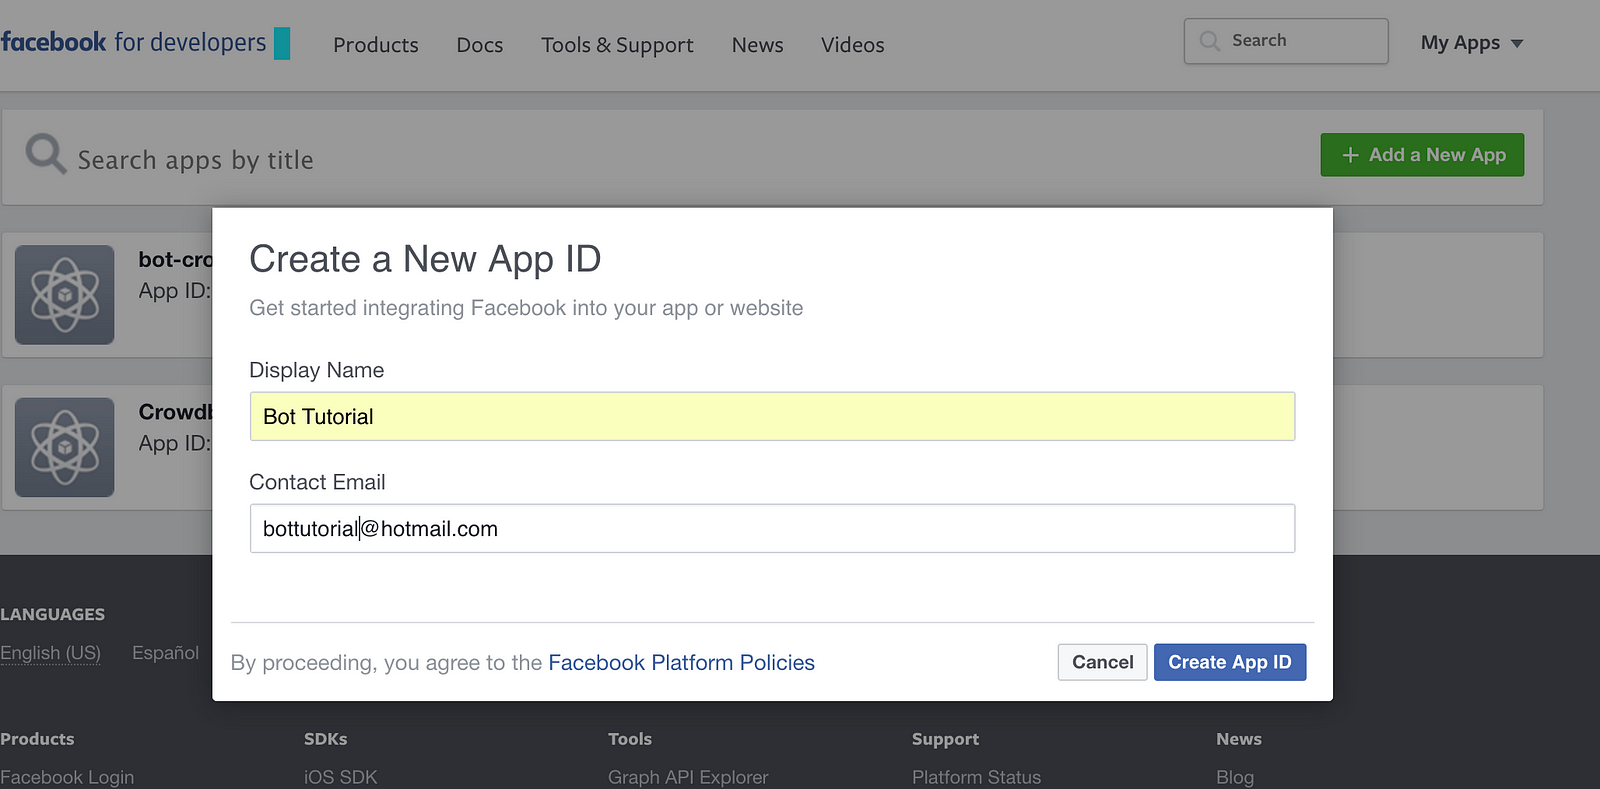
After that you’ll need to create an app. Go to developers.facebook.com/quickstarts, give your Facebook app a name, type in your e-mail, and then click the “Create App ID” button.
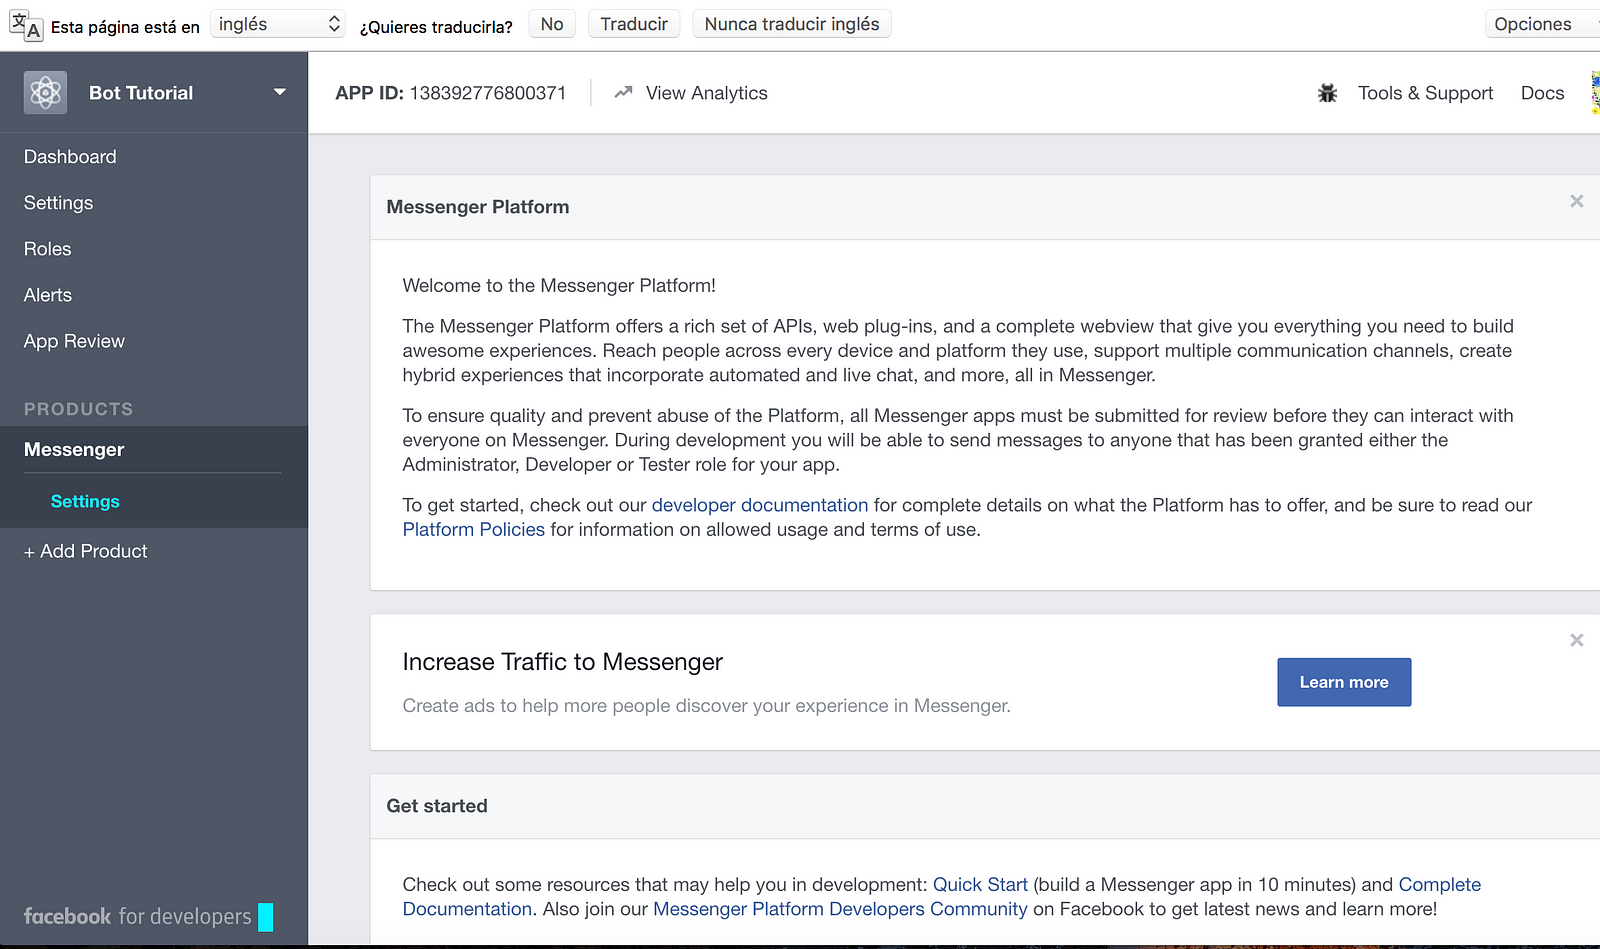
After creating the App, you have to select a product. Click the“Messenger” icon and then click on the “Set Up” button. This will redirect you to the Messenger Platform.
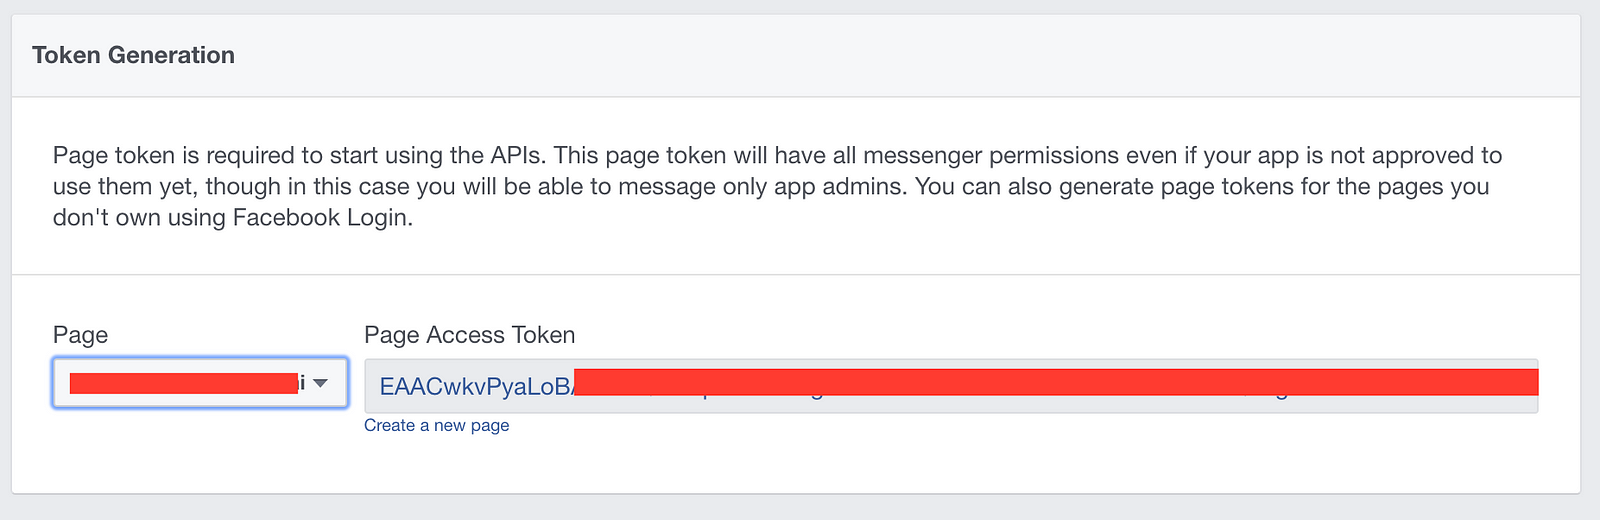
Once you’re there, you must locate the “Token Generation” section. Select the page you already created, and it will give you a Page Access Token that we will use later.
Below this section is the Webhooks section. Click on “Setup Webhooks” and it will show you a popup window, where you’ll need to fill out the following:
- Callback URL: With your ngrok URL.
- Verify Token: The string for validation that you already chose from controller/verification.js.
- Subscription Fields: Choose messages and messaging_postbacks. If you want to know more about webhook events read this information.
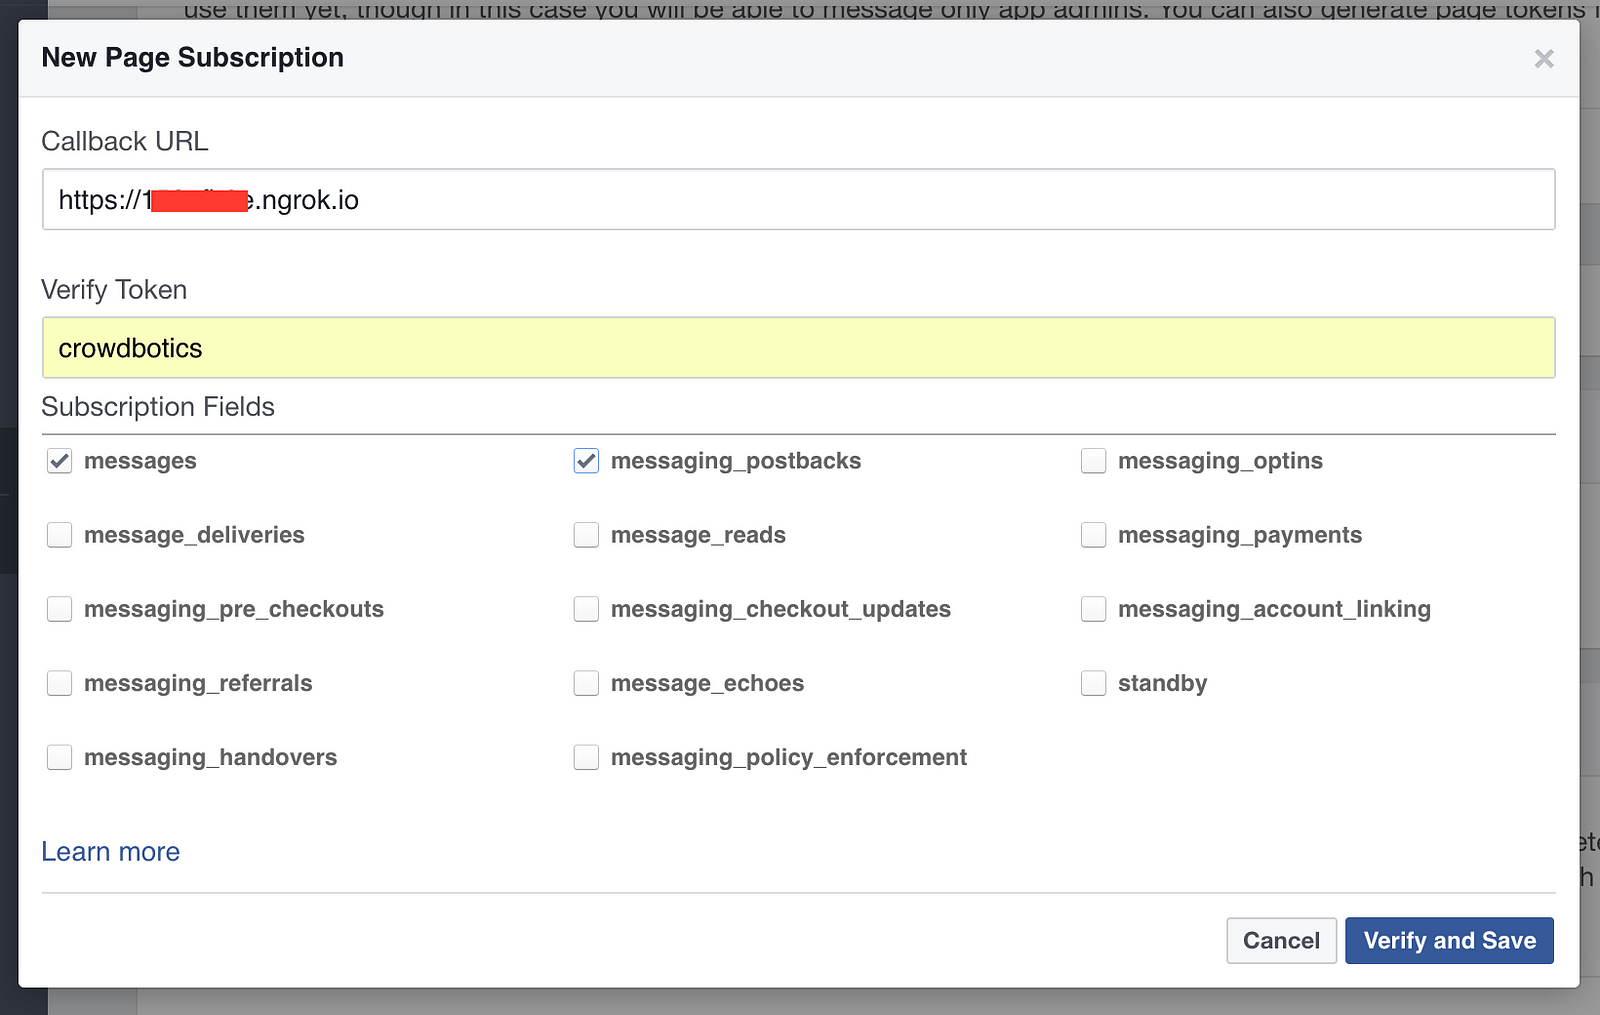
Click “Verify and Save” button.
Note: If the callback URL sent you a “502 Bad Gateway error”, it is because you aren’t running your local host server and the ngrok at the same time.
Until this moment our Facebook Application is well connected and working correctly, but we aren’t quite finished yet.
Step 2: Dialogflow integration
To get started we’ll head to the Dialogflow website and click the “Sign up for free” button. We’re then taken to a registration page, where you can log in with your Google Account.
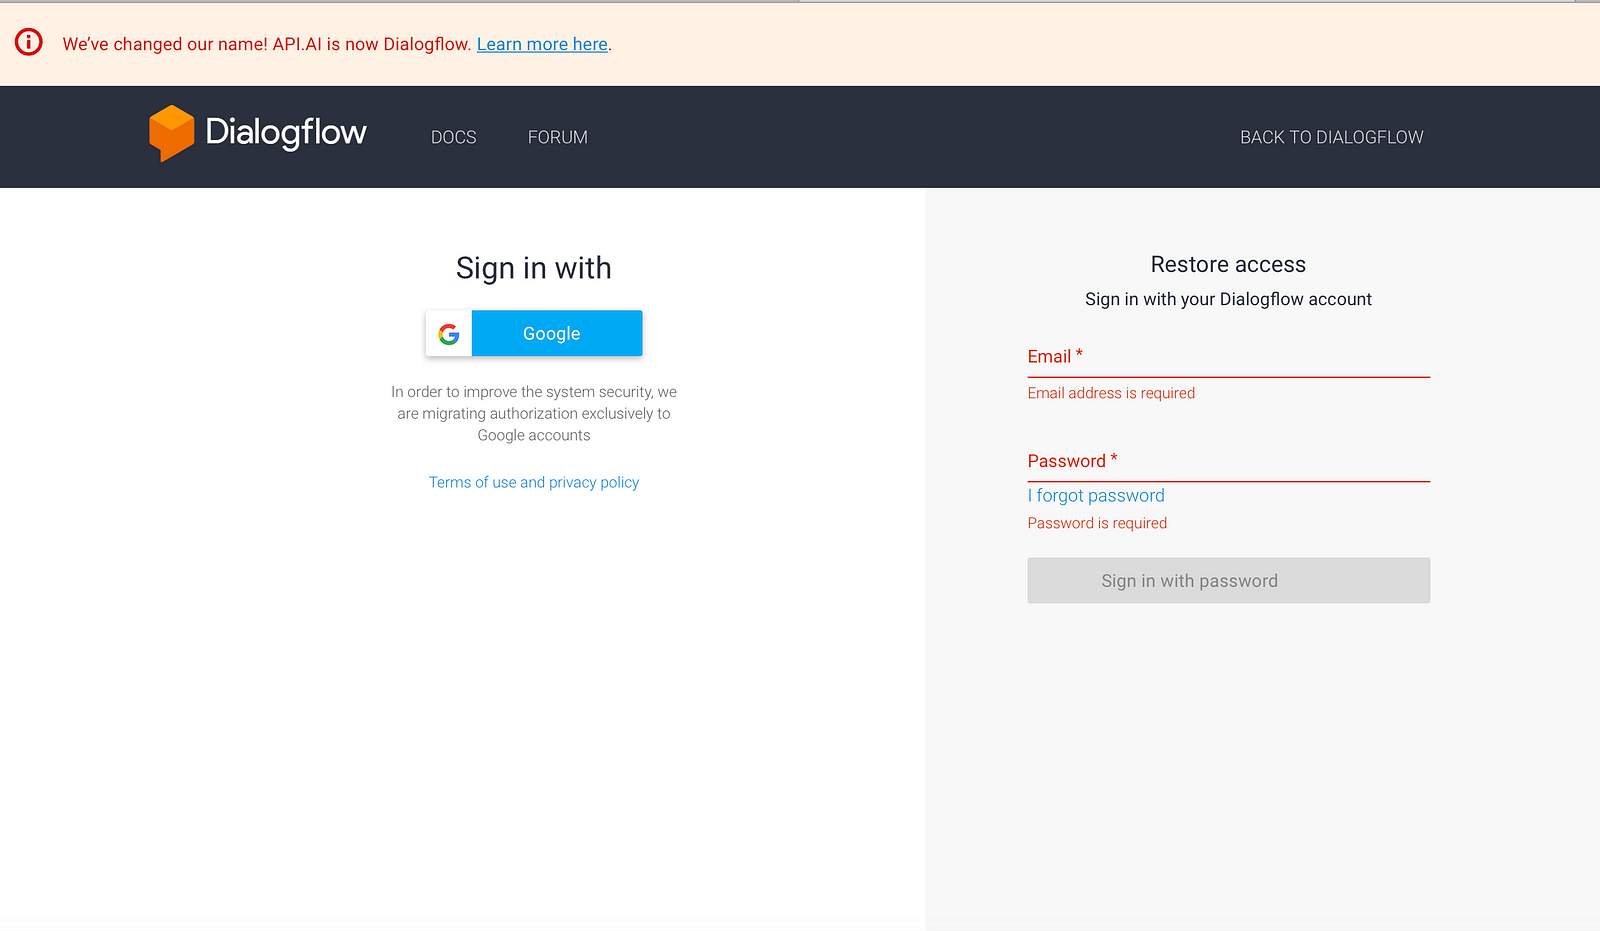
Once you’re in, you need to click Allow to grant Dialogflow access to your Google account in the screen that follows, and accept terms of service. And done! Now you’re in a Dialogflow interface!

It’s important that you watch the “Get Started’ video. Here, the Dialogflow team explains in general terms how the platform works.
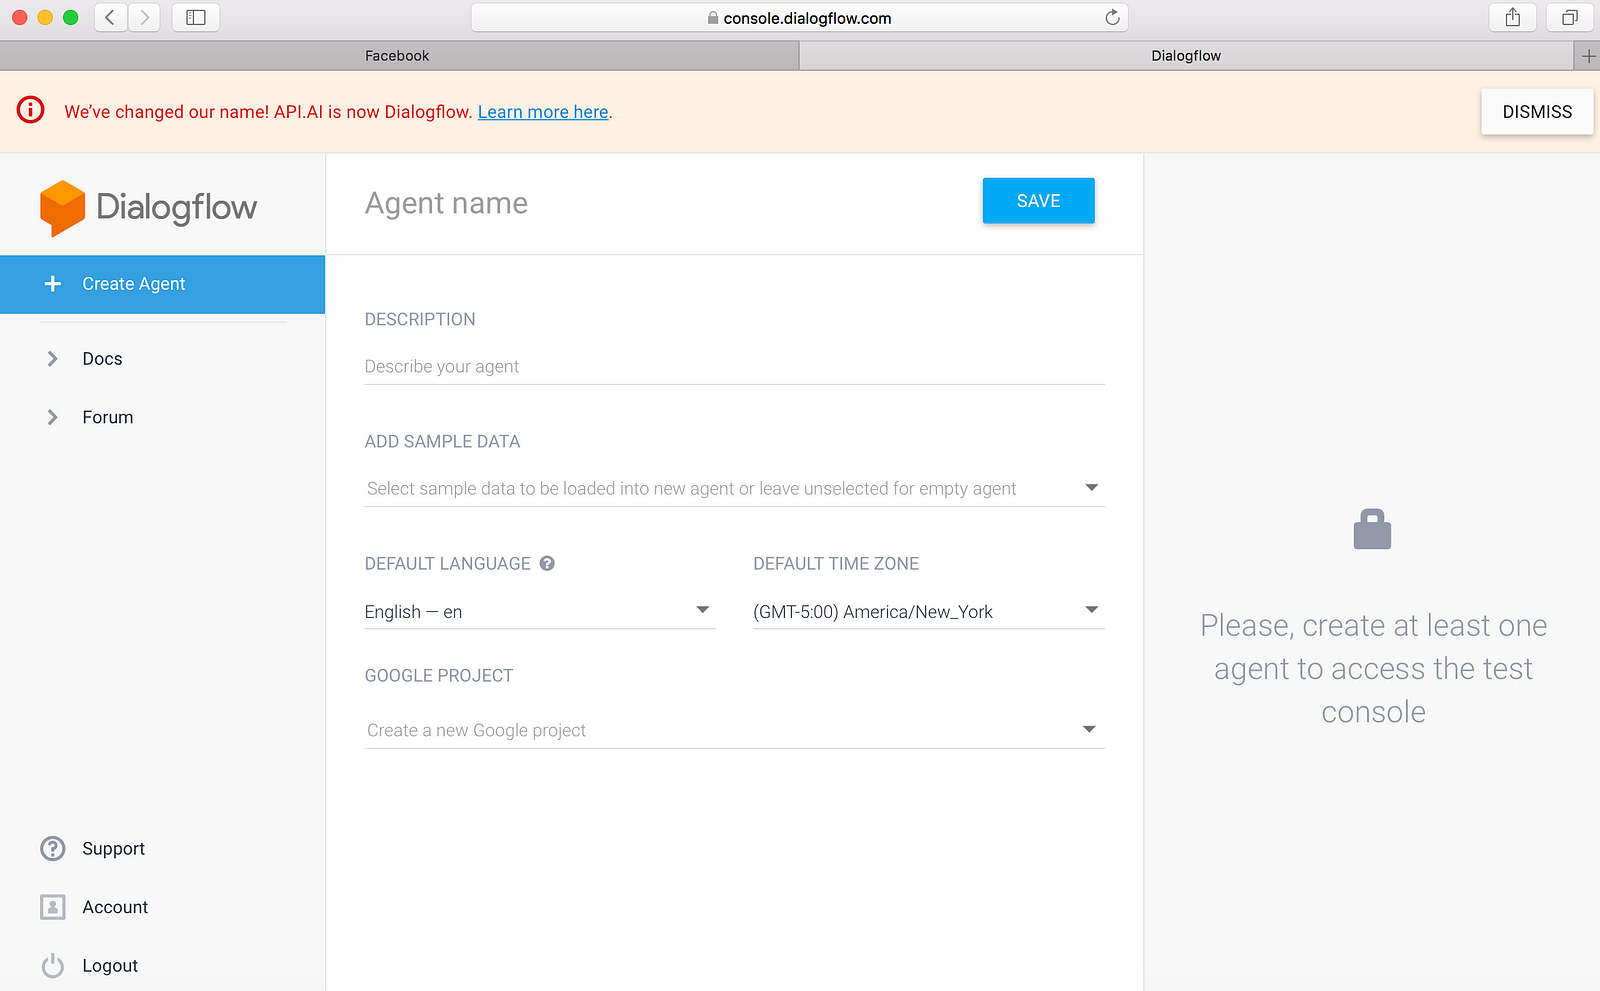
After this point, you can start prepping your virtual AI assistant. An agent is an assistant that you create and teach specific skills to. So, to begin with it, click on the “Create Agent” button. You may need to authorize Dialogflow again to have additional permissions for your Google account. This is normal, so click “Authorize”.
On the next screen, we have our agent’s details:
- Agent Name: This is for your own reference so that you can differentiate agents on your interface. You can choose any name you want.
- Description: A readable description, so you can remember what the agent does. This is optional.
- Language: The language which the agent works in. You need to choose right, because this cannot be changed. For this tutorial we’re going to work with English.
- Time zone: The time zone you want your agent to be in.
Then just click the “Save” button.
Step 3: Integrating Small Talk Agent To Your Bot
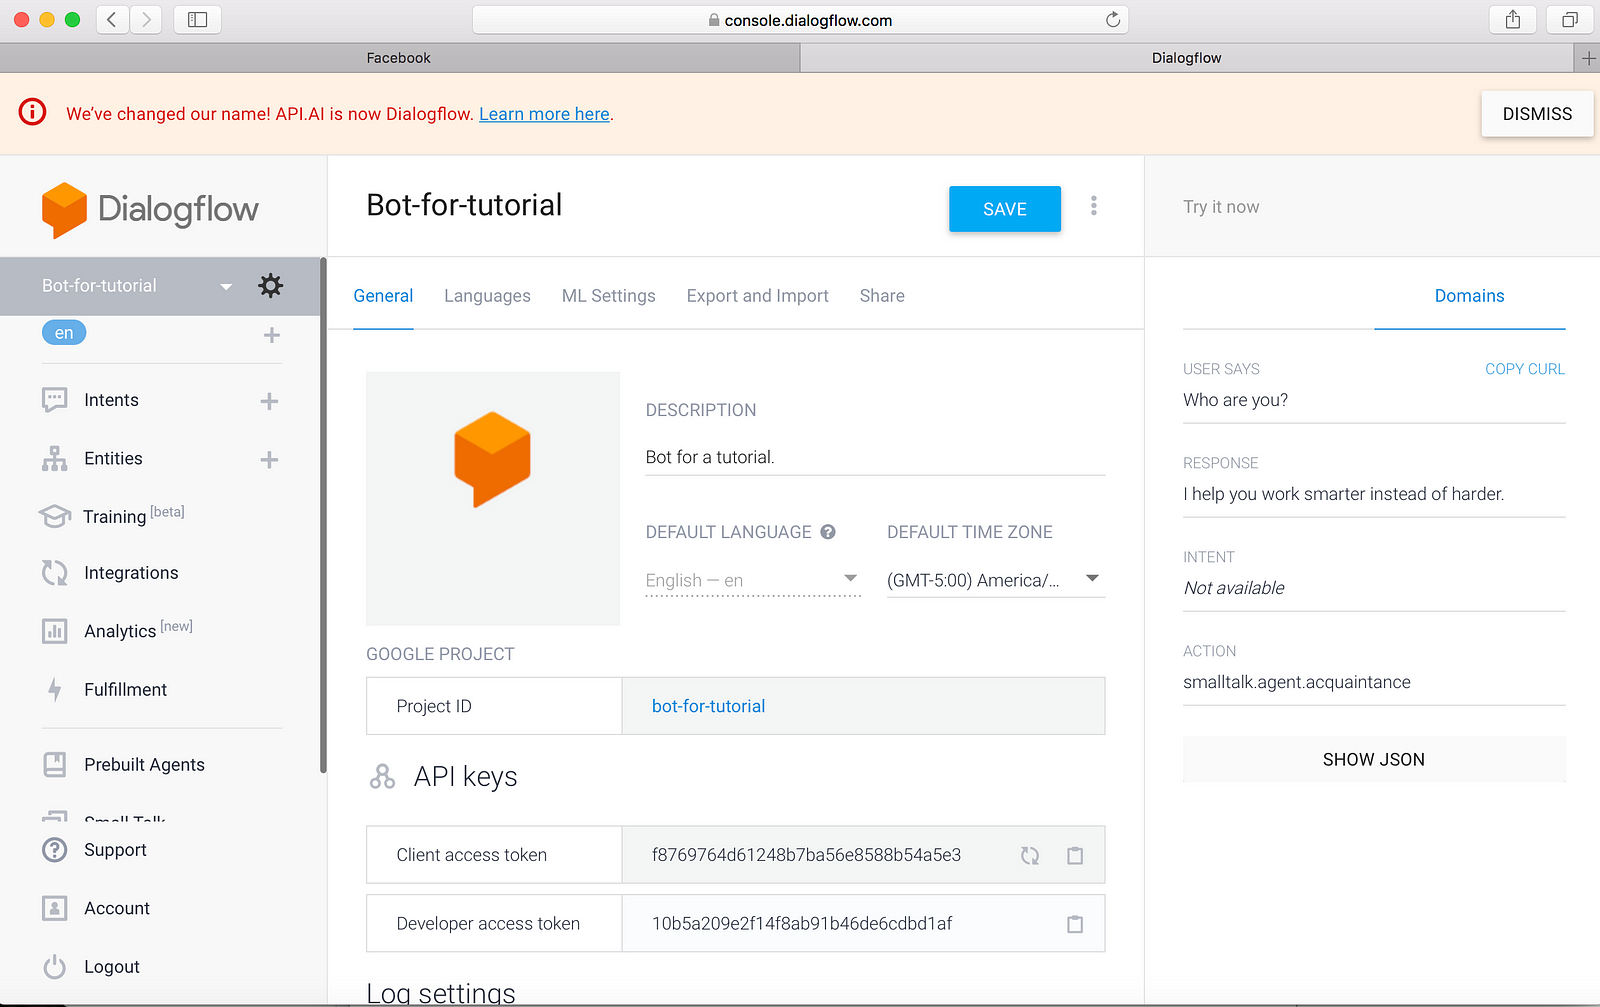
After you saved the main requirements, Dialogflow will redirect you to your bot main page. Here, go to the section called “Small Talk”.

Click on “Enable” button. There, you can try your bot in the Console over on the right side. Type whatever you want like “Hello, how are you?”, “ Who are you?”, etc… and you will see a response.
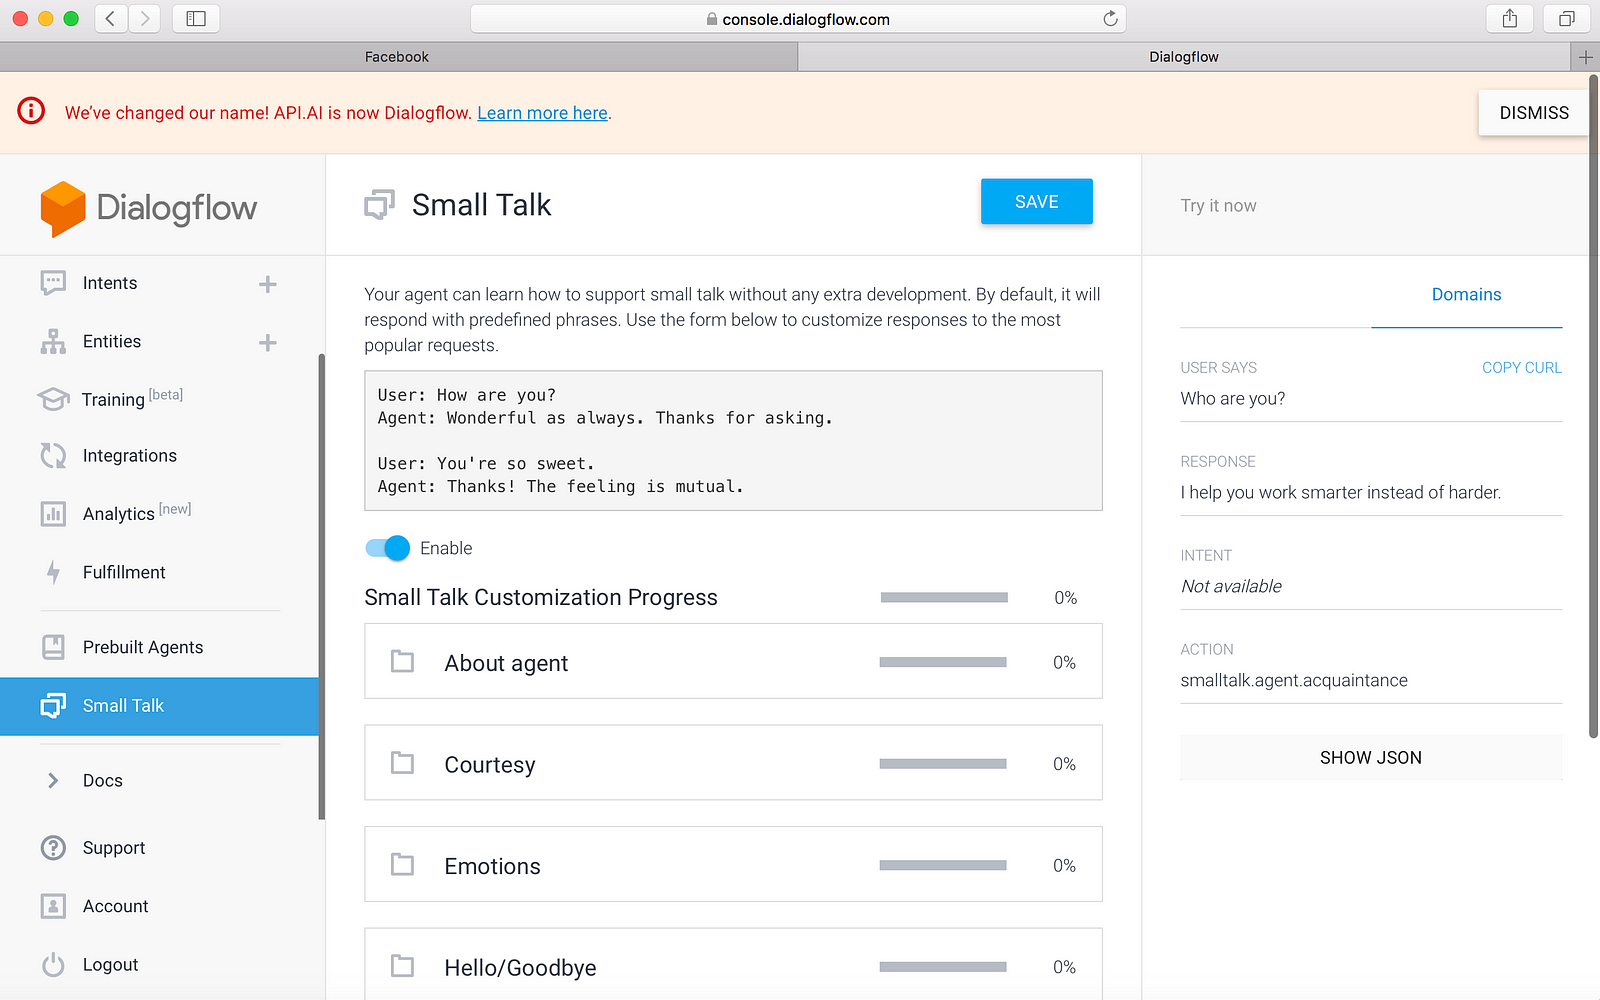
It works! You’re talking to a bot! Now the next step is so embed this conversation into our code base.
Before that, you have to install two different packages on your terminal:
- First, we have to install a request node package to be able to send requests to Facebook:
npm install —- save request
- Second, we have to install Dialogflow node.js package, but until now the Api.ai package is still working:
npm install —- save apiai
Once you are at this stage, implement the processMessage function. To do that, create a file at helpers directory and name it processMessage.js.
First, we have to initialize apiaiClient with the API key, to retrieve it, click the Configuration icon (gear) at the left menu and copy “Client Access Token”.
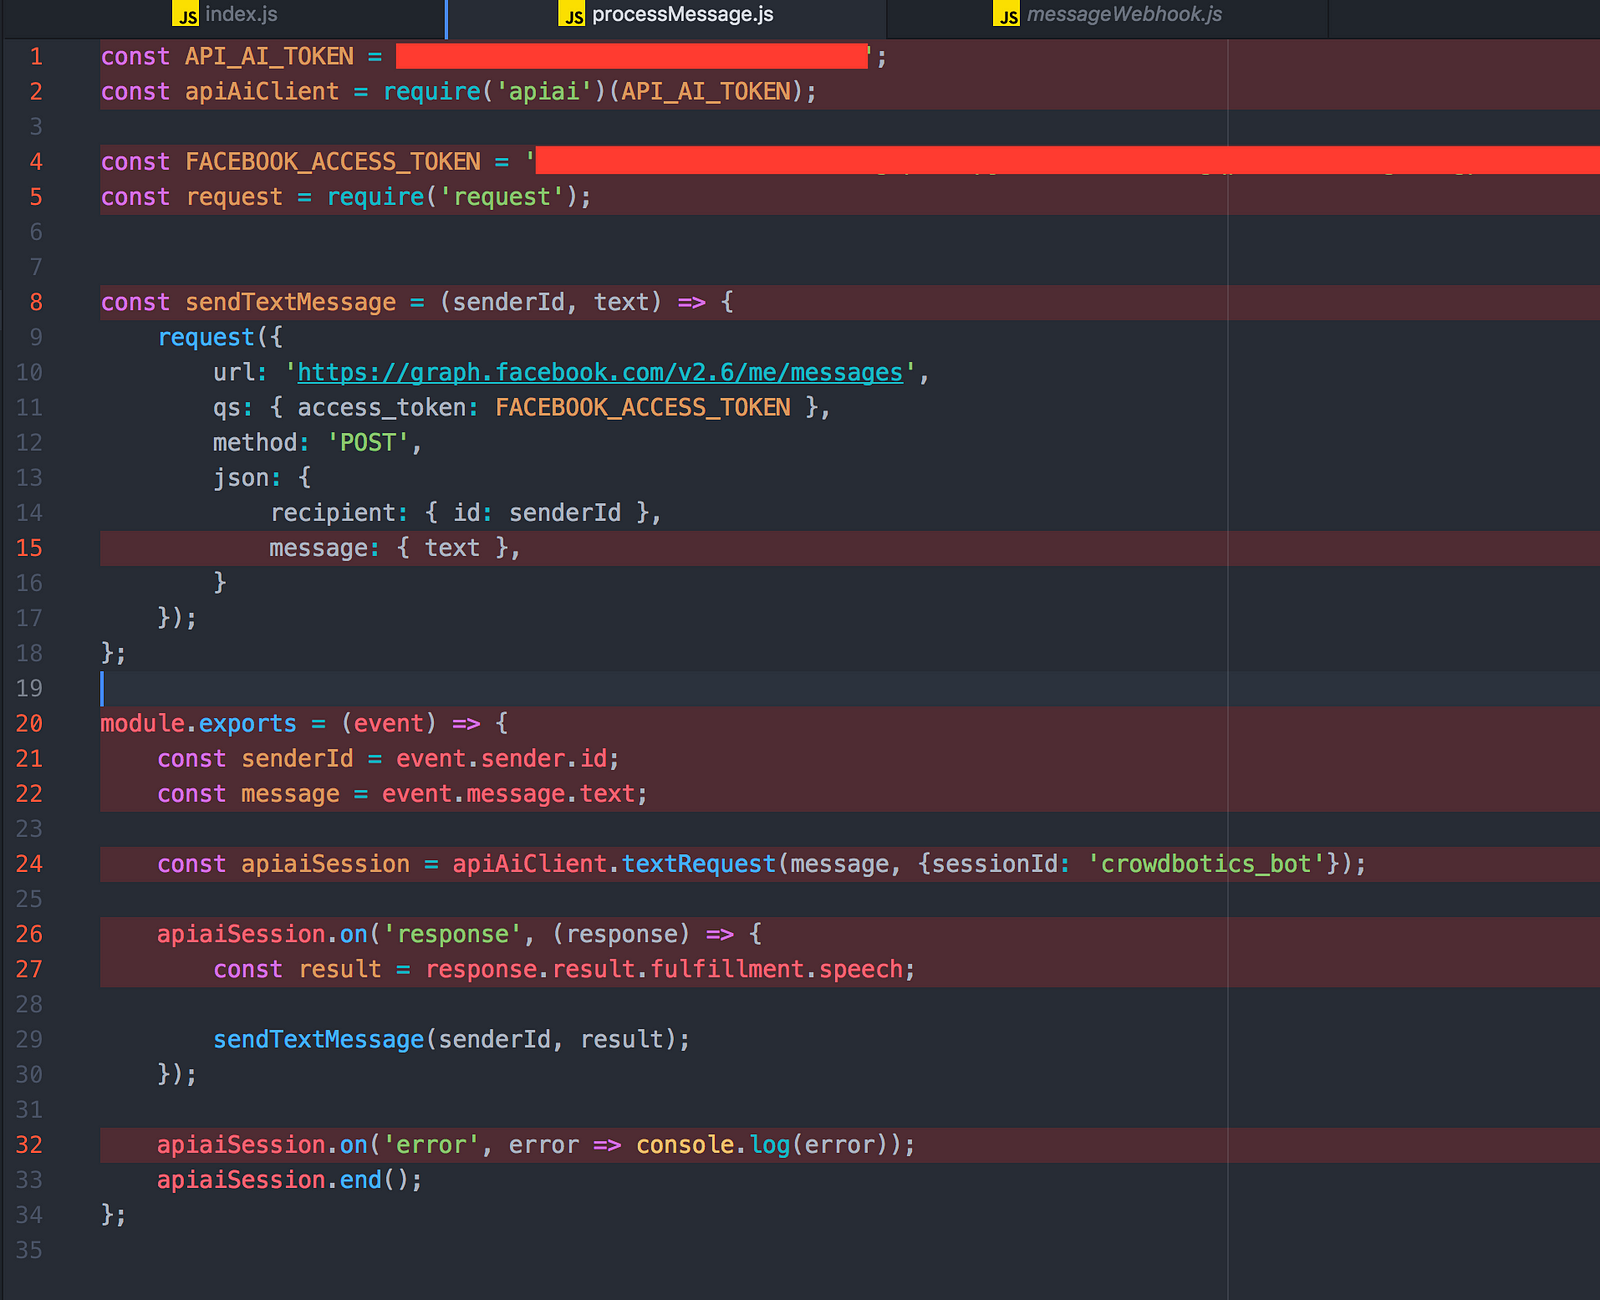
Now we have to implement processMessage function. Add your Client Access Token in const API_AI_TOKEN and your Facebook Page Access Token in const FACEBOOK_ACCESS_TOKEN.
const API_AI_TOKEN = ‘your Dialogflow Client Access Token’;
const apiAiClient = require(‘apiai’)(API_AI_TOKEN);
const FACEBOOK_ACCESS_TOKEN = ‘your Facebook Page Access Token’;
const request = require(‘request’);
const sendTextMessage = (senderId, text) => {
 request({
 url: ‘https://graph.facebook.com/v2.6/me/messages',
 qs: { access_token: FACEBOOK_ACCESS_TOKEN },
 method: ‘POST’,
 json: {
 recipient: { id: senderId },
 message: { text },
 }
 });
};
module.exports = (event) => {
 const senderId = event.sender.id;
 const message = event.message.text;
const apiaiSession = apiAiClient.textRequest(message, {sessionId: ‘crowdbotics_bot’});
apiaiSession.on(‘response’, (response) => {
 const result = response.result.fulfillment.speech;
sendTextMessage(senderId, result);
 });
apiaiSession.on(‘error’, error => console.log(error));
 apiaiSession.end();
};
And, to make it work you also need to add a couple of lines to your index.js to set up the endpoints.
const verificationController = require(‘./controllers/verification’);
const messageWebhookController = require(‘./controllers/messageWebhook’);
app.get(‘/’, verificationController);
app.post(‘/’, messageWebhookController);

What happened?
If you look at the code, your webhook server received the information from a user via Facebook Messenger, then passed the text content to Dialogflow. Once it responded, the response event was triggered, and the result was sent back to Facebook Messenger.
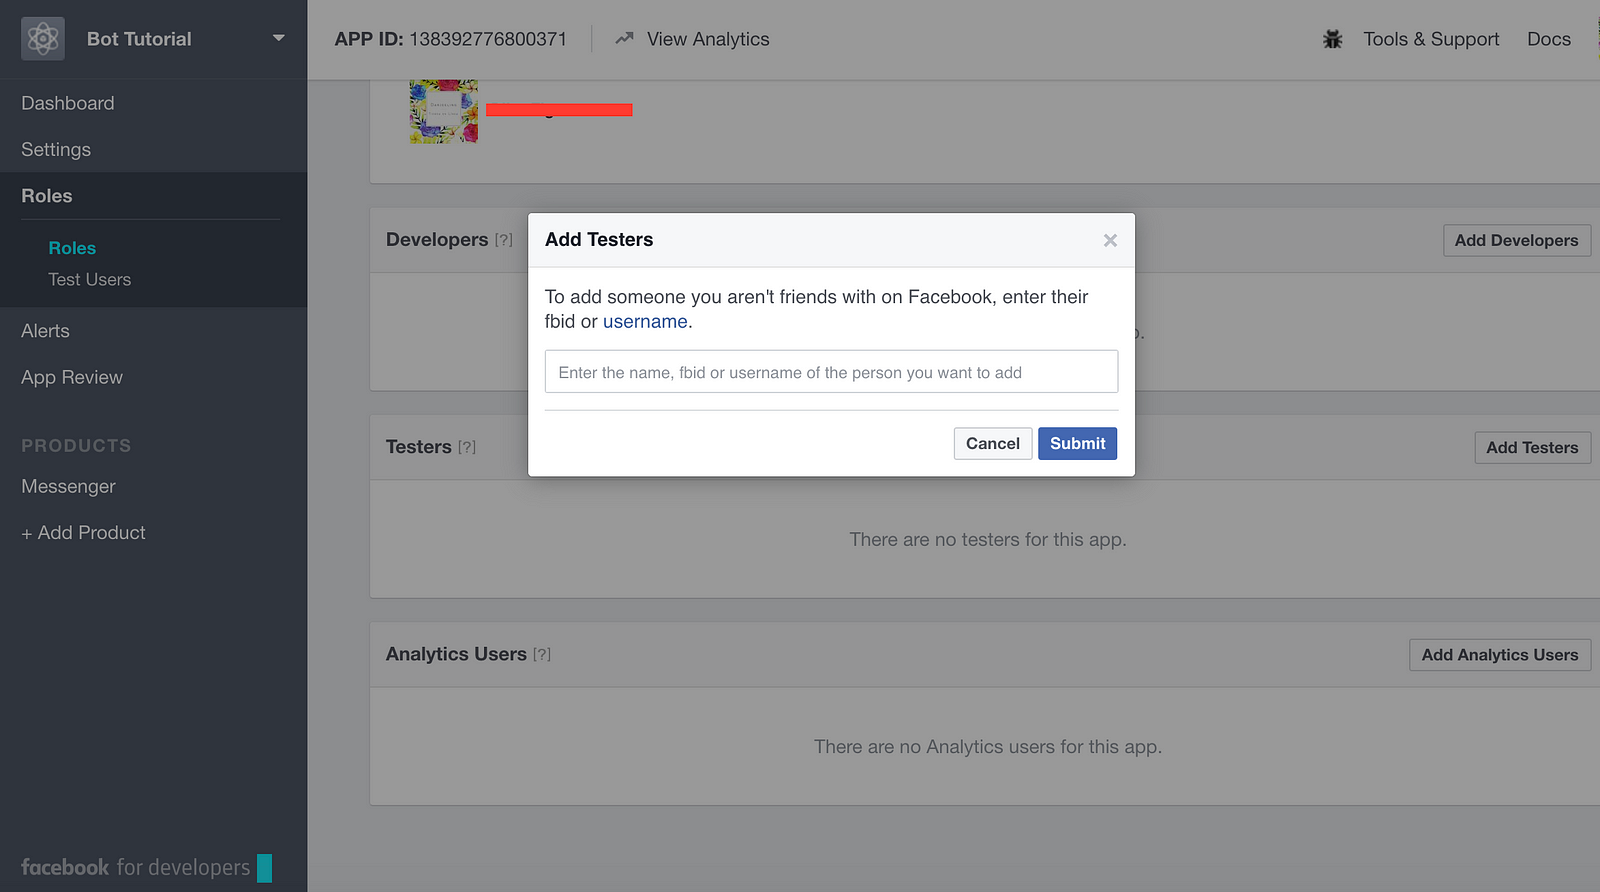
Before testing our bot, it is very important that you know when your app is in Development Mode. Plugin and API functionality will only work for admins, developers and testers of the app. After your app is approved and public, it will work for the general public.
To add a tester, you just need to go back to your Facebook App, find the “Roles” section and click on it. Then in the “Testers” section, click “Add Testers” button, it will throw you a popup window where you can add the Facebook ID or username for the person you want test your bot. Finally, click “Submit” button and the person can send a message to your bot throw your Facebook page.
Now, all that’s left is to test our bot. If your server was running, turn it off and run index.js again. If all is well with your bot, you should get replies from the bot for some simple questions like “How are you?”, “Who are you?”, etc…
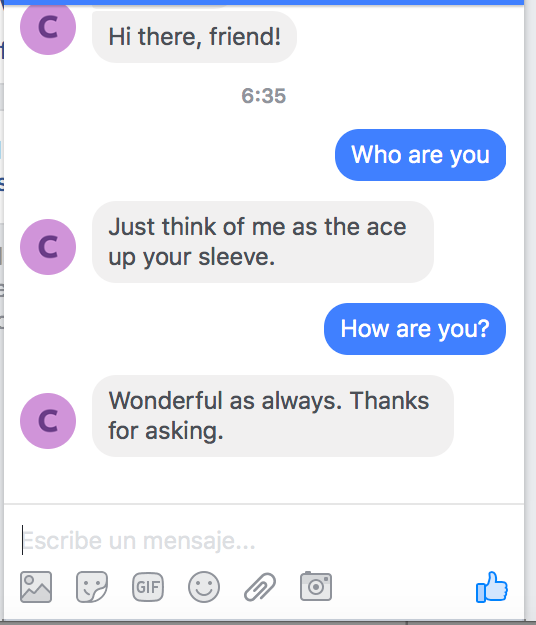
Awesome!
But guess what — this is just the beginning. There are so many other things that you can do with your bot.
As we mentioned before, an agent (your bot) is essentially the container or project and it contains intents, entities, and the responses that you want to deliver to your user.
Intents are the mechanisms that pick up what your user is requesting (using entities) and direct the agent to respond accordingly.
Step 4: Creating an Intent
In order to create an intent, log into the agent you’d like to add the new functionality to. Go to the Dialogflow console, locate the section of intents, and click on the “+” button.
The sample intent for this agent is to teach it to answer simple questions. In this case we’re going ask him about Crowdbotics.
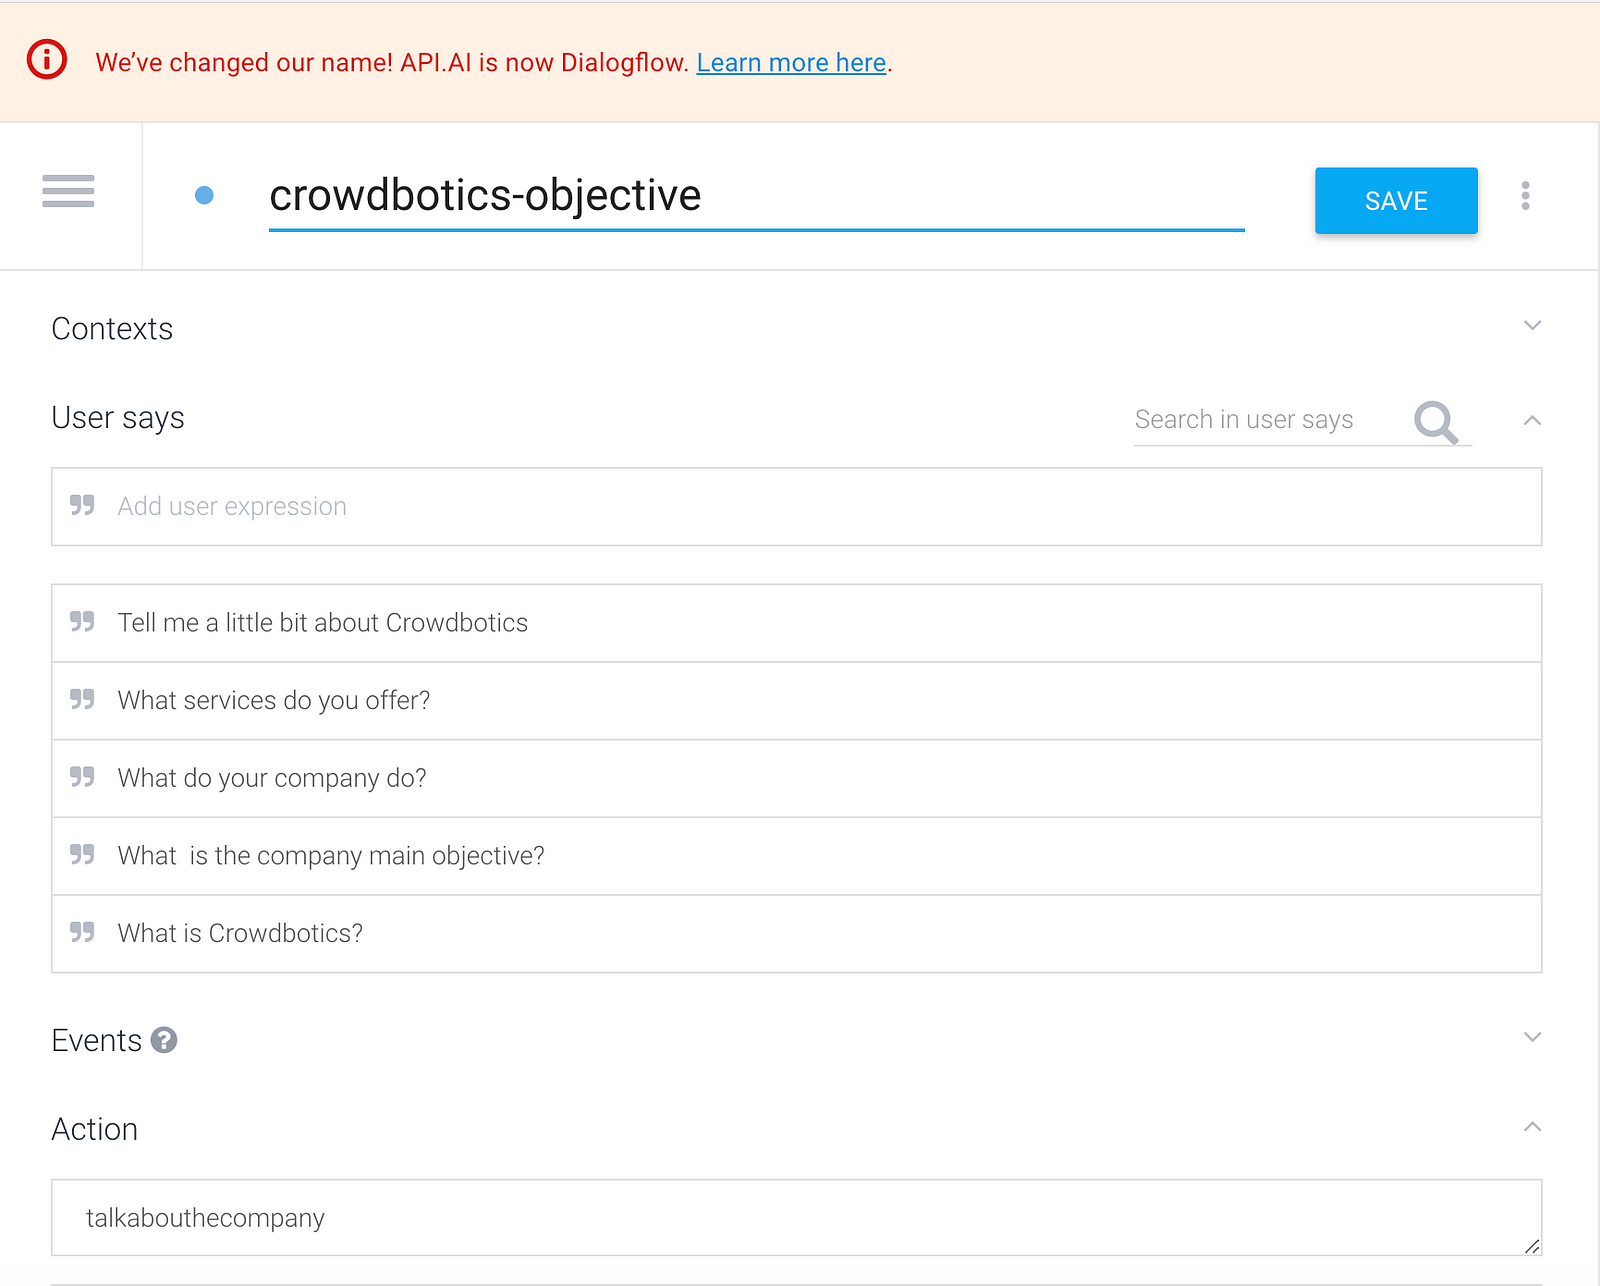
To start, give a name to your intent. It is recommendable that you choose a name that describes what you want your intent do. In this case we will name it the “crowdbotics-objective”.
Then in the “User says” section, add your first trigger sentence. As the name suggests, this is going to be how a user can ask your bot about something and why you need to add several examples for the bot to learn from.
To add a sentence, you just need to type it and the hit “Enter”.
Now there’s a range of sentences the agent should understand, but you haven’t told it what action is expected when it hears them. To do so, create an “action”. It will need to be all lowercase with no spaces.
After your user has told the agent what it is expecting from it, you need to add some responses. To do that, go to the “Response” section and there you can add some different responses for your users questions.
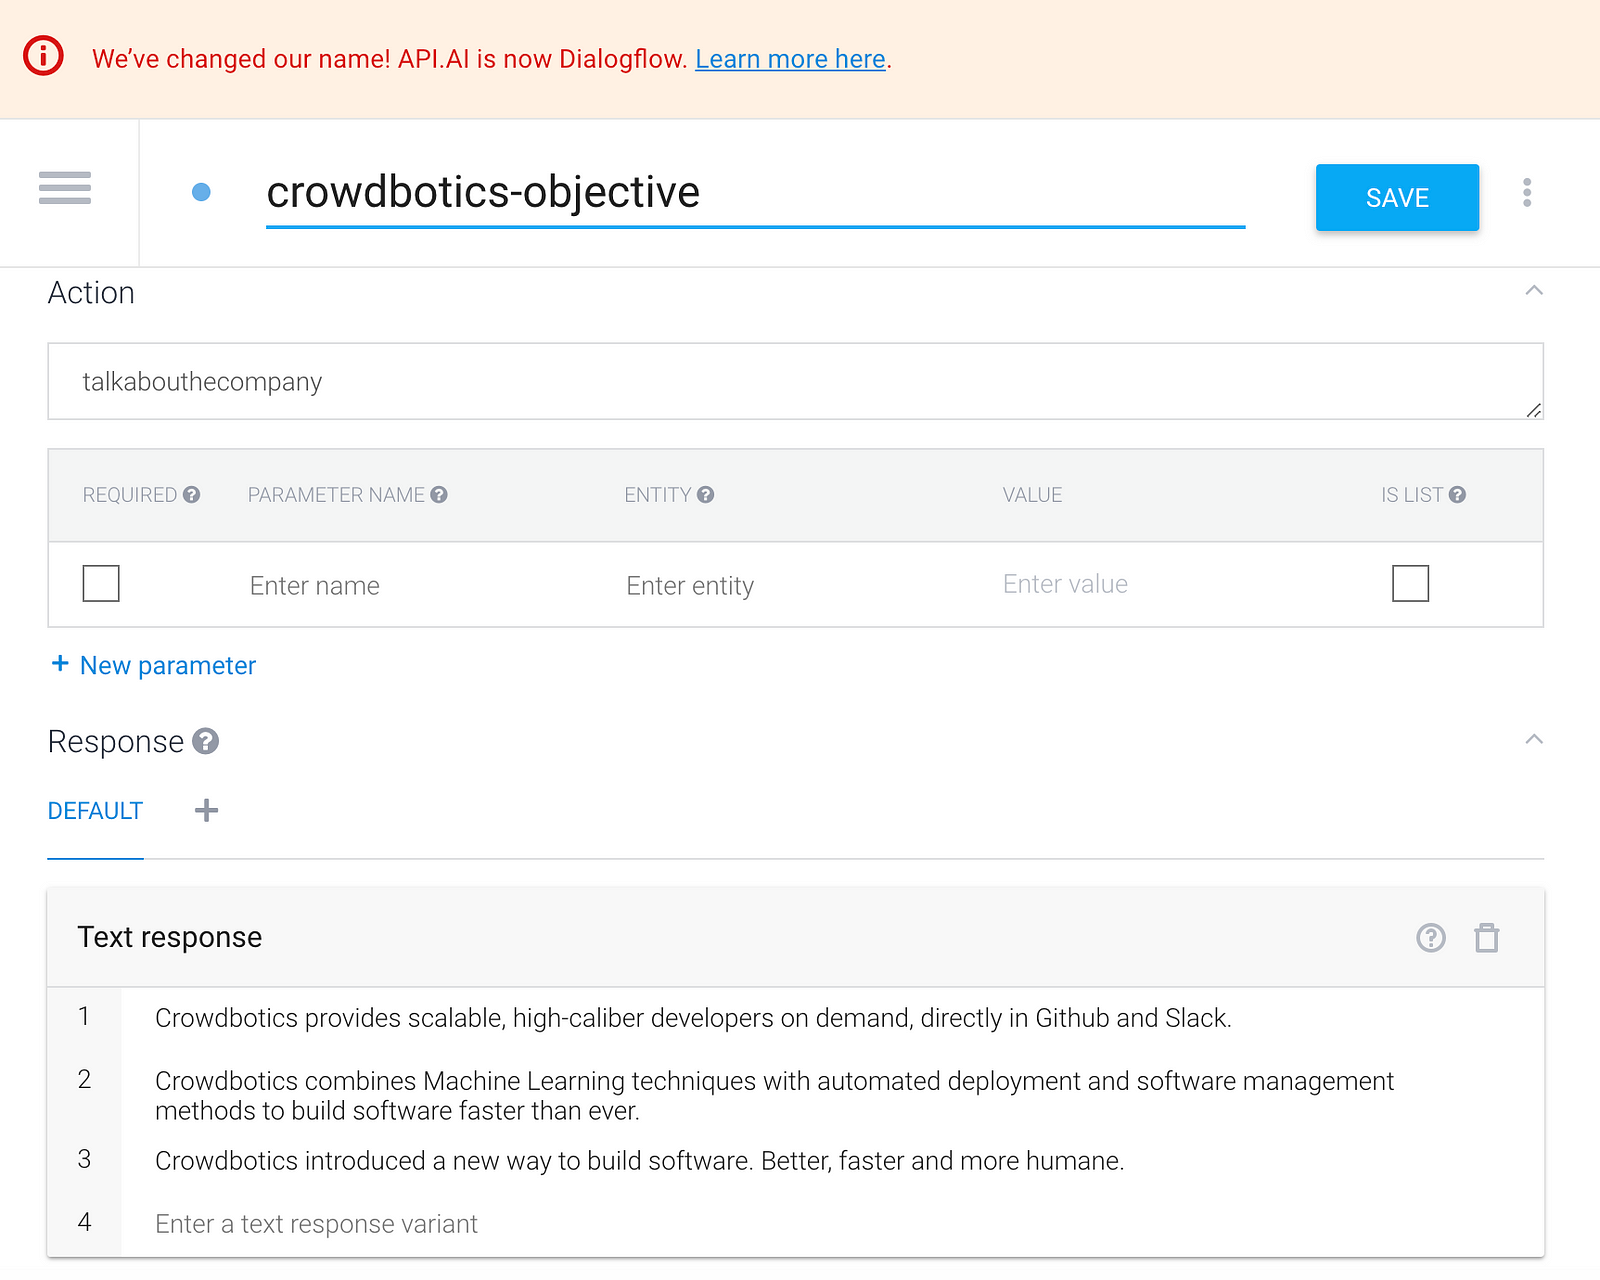
Finally click the “Save” button next to your intent name to save the entire progress.
So now, one thing is missing — you have to try out your agent!
You can test your new intent by typing a test statement into the Console on the right. Type a question similar to one you already added the in “User says” section and watch the response.
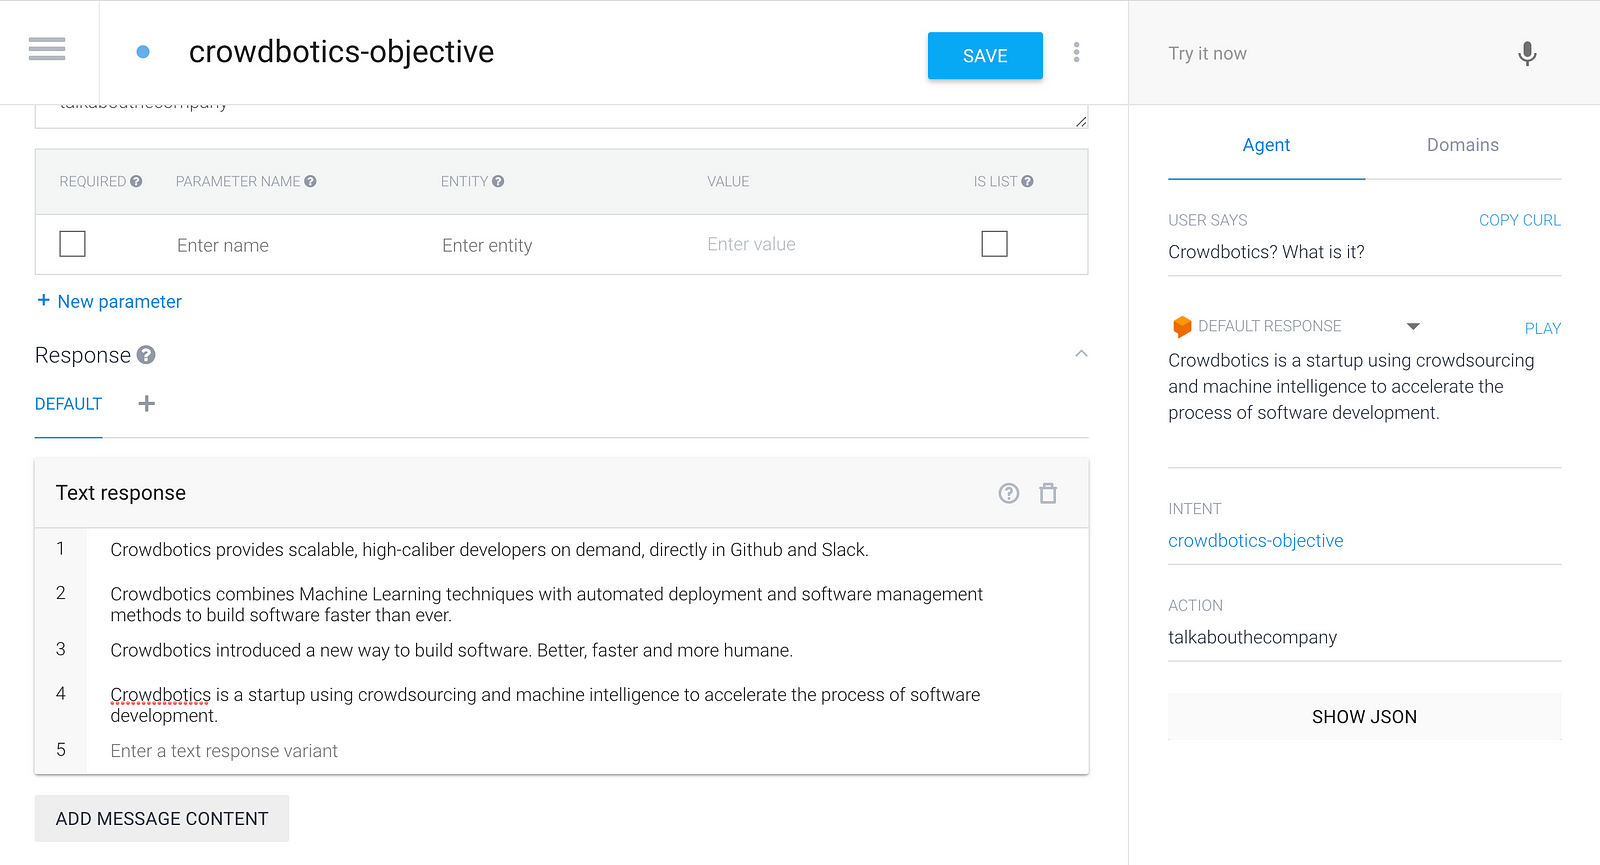
As you can see, our agent responds back with one of your trained responses. You can see the power of machine learning in action since even if you enter a question that you didn’t define, the agent knows how to interpret it and return a response.
Remember, the more statements you add, the better your agent will be able to respond.
Finally, let’s going try on Facebook Messenger.
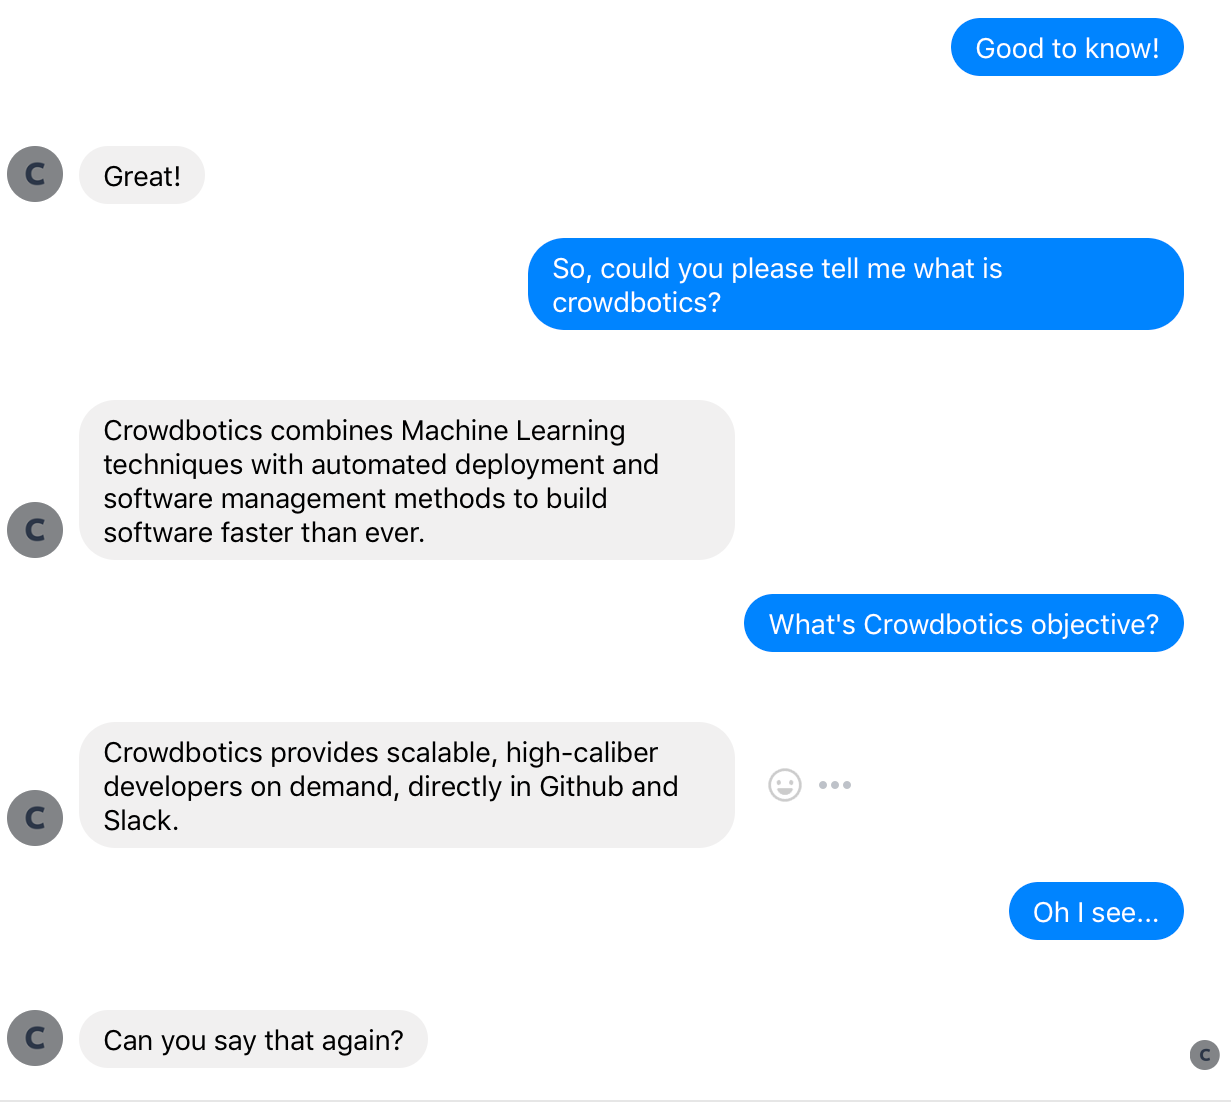
What's more, it is working! In this way, now you can make a basic however exceptionally effective chatbot. You can include as much intuitiveness as you need. You can have your bot work with substances, make API calls, voice acknowledgment, and so forth…
A debt of gratitude is in order for perusing! As should be obvious, making a chatbot doesn't need to be as overwhelming as it appears.


